Create a photography website in 4 easy steps (2026)

As seen in:
Top 3 website tools for photographers
-
Visit site
Test score
8.7
2026
Very good
-
Visit site
Test score
8.2
2026
Very good
-
Visit site
Test score
7.1
2026
Good
As a photographer, you need an attractively designed website to present your images and services in the best possible light.
Creating a professional-looking photographer website is easier than you might think!
All you need is basic computer skills – and this guide.
You only need to pay a small rent for your virtual studio. For 5 to 10 euros per month, you can welcome guests to your online portfolio around the clock.
You can even create a photographer website for free. Read this guide to find out whether it’s worth it for you.
Let’s get started! Let’s develop the perfect website for your photography business!
Follow these steps to create your photography website:
- Table of contents
- What makes a good photographer’s website?
-
Which methods are most suitable for creating a photographer’s website
- You can choose from these 3 methods:
- Website builder – how to easily create a high-quality website for photographers
- Advantages and disadvantages of a website builder
- Squarespace: the website builder for design lovers
- The best website tools for photographers
- Have you chosen your preferred tool? Then let’s register your desired domain!
- How do I plan my photography website?
- How do I design my photographer homepage?
- What else do you need to consider when creating your photography website?
To show customers your photos and corresponding services in the best light, you need an attractively designed website with plenty of space for your online portfolio.
Your photographs should be at the centre of the homepage. You can present a selection of your images in the form of a gallery or an album – and sell them via your own online shop.
Visitors to your photographer website are interested in your inspiration, your career and your vision. Offer them the opportunity to get in touch with you.
What do you want to achieve with your photography website?
Before we start designing your website, think about what you want to achieve with your photography website.
What goals do you have in mind?
Goals and requirements for a website for photographers:
- Presentation of your photographs (e.g. in the form of galleries or albums)
- Overview of your services, specialisms or studio equipment
- Presentation of your training and skills
- Possibility to contact you (form/chat)
The following photographer homepage examples may help you find ideas:
3 examples of successful photography websites

Powerful images
Berlin photographer Markus Braumann lets his pictures do all the talking. The homepage of the website created with WIX* shows a selection of his work.
In three main menu items – “People”, “Moments” and “Product” – Braumann has published a large number of his works. These can be called up and clicked through in gallery form.
The contact page contains an e-mail address and telephone number. Braumann has refrained from including a form. There is also no personal or career information on the website itself.
The personalities portrayed, such as footballer Serge Gnabry or singer Lena Meyer-Landrut, testify to the photographer’s experience and skill.

Image and sound
Sean Tucker is a British photographer and filmmaker. On his homepage, created with the Squarespace* construction kit, Tucker welcomes his visitors with high-quality and impressive portraits.
The images can be viewed in a gallery and clicked through.
The menu on the left-hand side of the page features other forms of Tucker’s work, such as street photography and film documentaries.
Tucker has integrated an online store where he sells art prints, books and magazines. On his “About me” page, Tucker briefly reveals some information about himself and his career.
At least there is a photo of Tucker. Visitors to his homepage should probably use the photographs and videos to get an idea of who he is.
Visual language
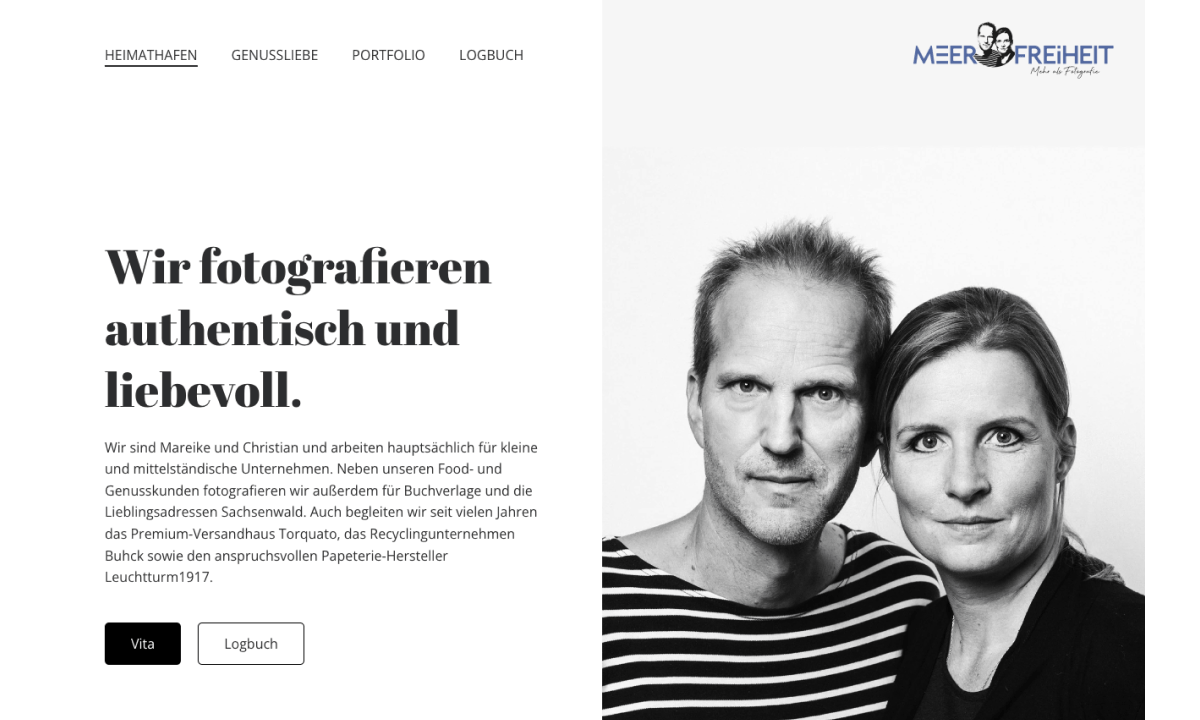
Photographers Mareike Suhn and Christian Geisler relied on Jimdo* to create their website (“Meerfreiheit“). In addition to high-quality photos, you will also find descriptive texts.
The two photographers attach great importance to portraits of special people and good food.
An overview of their work can be found in their portfolio. Suhn and Geisler provide more information about the creation of the images in an integrated blog called “Logbook”.
There is also a gallery format on “Meerfreiheit” where visitors can call up and click through the photos.
Have you already got an idea of what you should consider for your photographer website? No? Then I have more inspiration for you here.
Functionalities that are useful on a photography website:
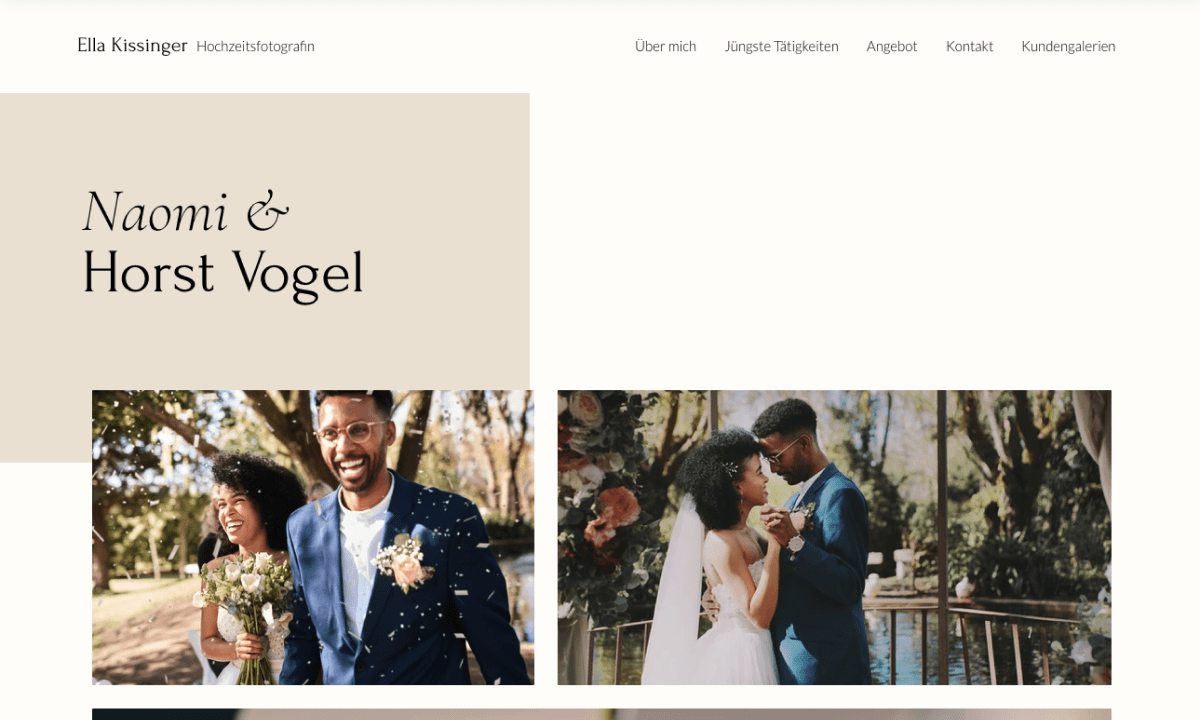
For you as a photographer, it is very important that your images take center stage when creating a homepage.
You can present a selection of your most important works in the form of galleries or albums. The website builder providers presented here, such as WIX*, offer you corresponding functions.
You can also subdivide your portfolio page, for example to separate your portrait or baby photos from jobs such as advertising or objects.
You can add your name, a title and a short descriptive text to the photos on your homepage.
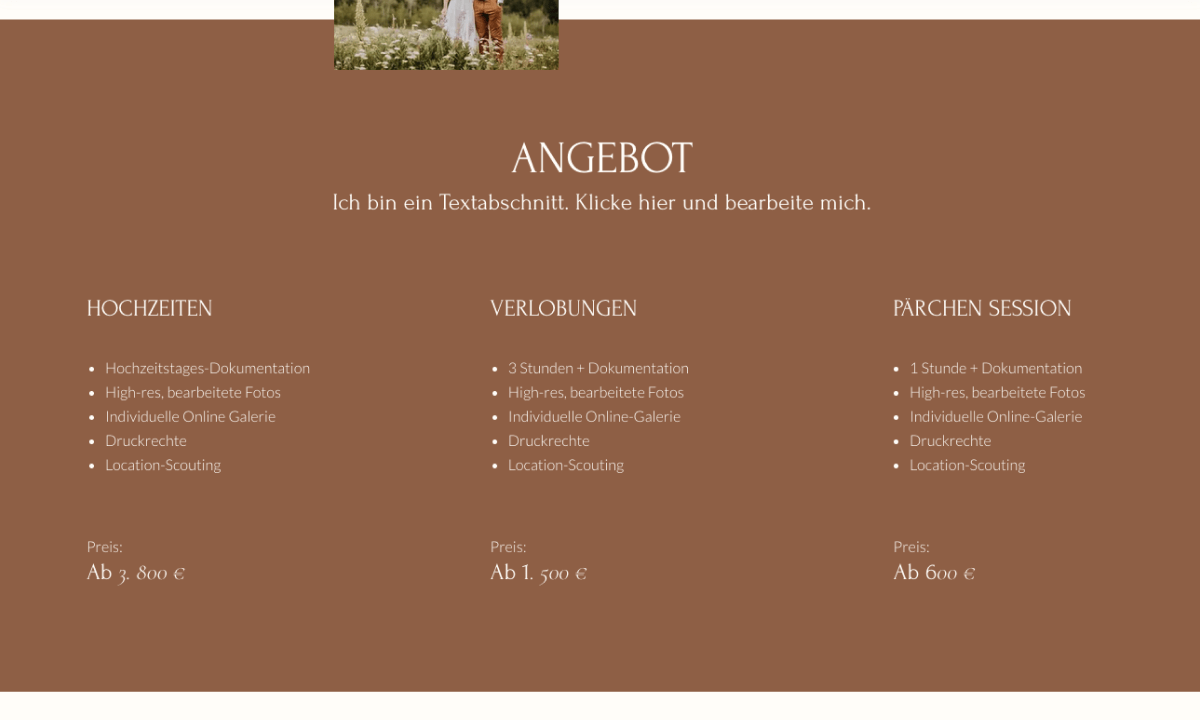
If you offer your photography skills professionally, it is advisable to set up a separate section for services on your homepage.
Here you can present individual offers, such as portrait, wedding or advertising photography, with the corresponding scope and prices.
Illustrate the whole thing with meaningful photos of your own so that potential customers can get an idea.
You can also integrate additional tools such as an appointment calendar, a contact form and a payment option on your offer pages.
For example, interested parties can book a photo shoot with you and pay online straight away.
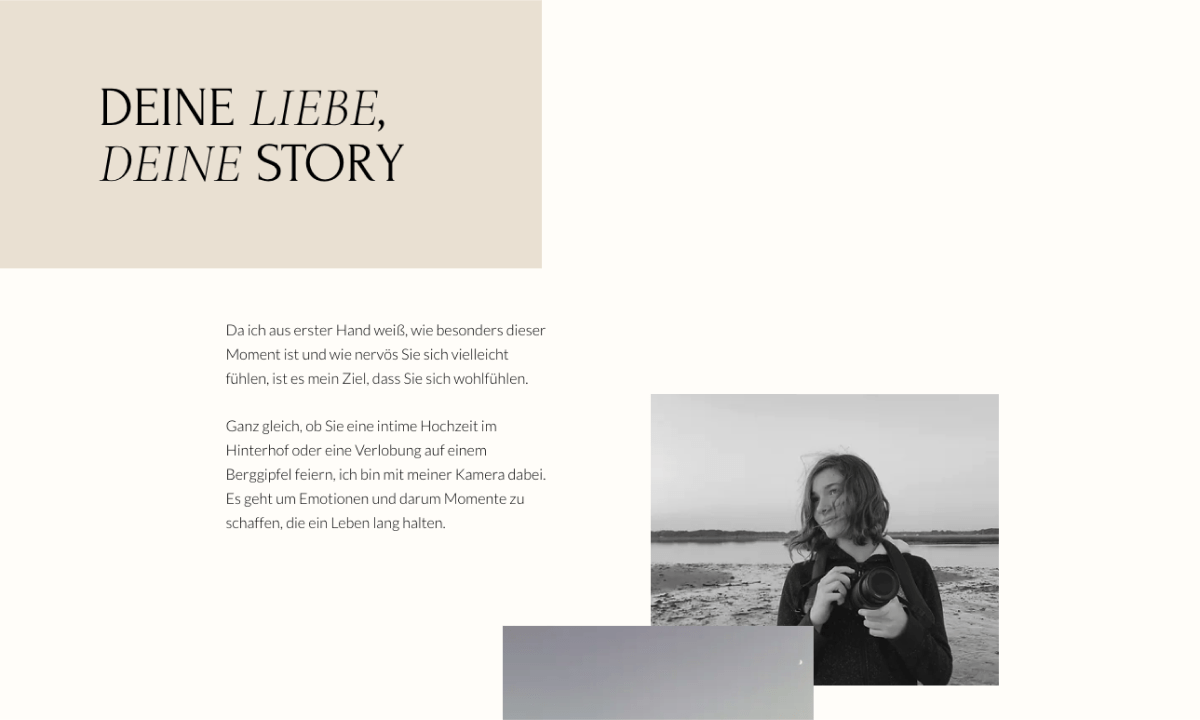
It doesn’t matter whether you want to present your art on your photography website or advertise the services of your photo studio. Visitors to your website want to find out more about you and your skills.
You can write more about your training, your career and possible exhibitions or certificates. Keep your CV clear, concise and well-structured so that visitors have a quick overview.
Add a friendly or creatively designed photo of yourself or your studio here.
You can also add a contact form here or a button that leads to your contact page.
Other functionalitites that can be useful for a photographer’s website:
- Password-protected albums to send clients the preselection and final images
- Blog area and/or newsletter function for your marketing
- Domain name for photography website plus email address
- SEO functions (ensures better findability and presentation on Google)
We have now clarified which functions and content you should plan for your photography website.
Let’s move on to the next step. You can also add individual features later.
Not sure yet? Below, I’ll go into more detail about the pros and cons of the different creation methods and providers for creating your photography website.
Before you start creating your photography website, you should choose the most suitable method.
You can choose from these 3 methods:
| Method | Method description |
|---|---|
| 1. Website builder | Best suited for beginners Modern website builders allow even beginners to create a high-quality website directly in the browser. Instructions and recommended tools |
| 2. WordPress (or other CMS) | For the realisation of more complex projects You can also create coaching websites with WordPress. The most popular content management system (CMS) for creating websites offers a high degree of flexibility and independence, but getting started is more complex. More about website creation with WordPress |
| 3. Have a web design created | Convenient, but significantly more expensive The providers differ greatly in terms of service and costs. You can have a simple website created from around EUR 1,000, with prices going upwards. Tips on having a website created |
Website builder – how to easily create a high-quality website for photographers
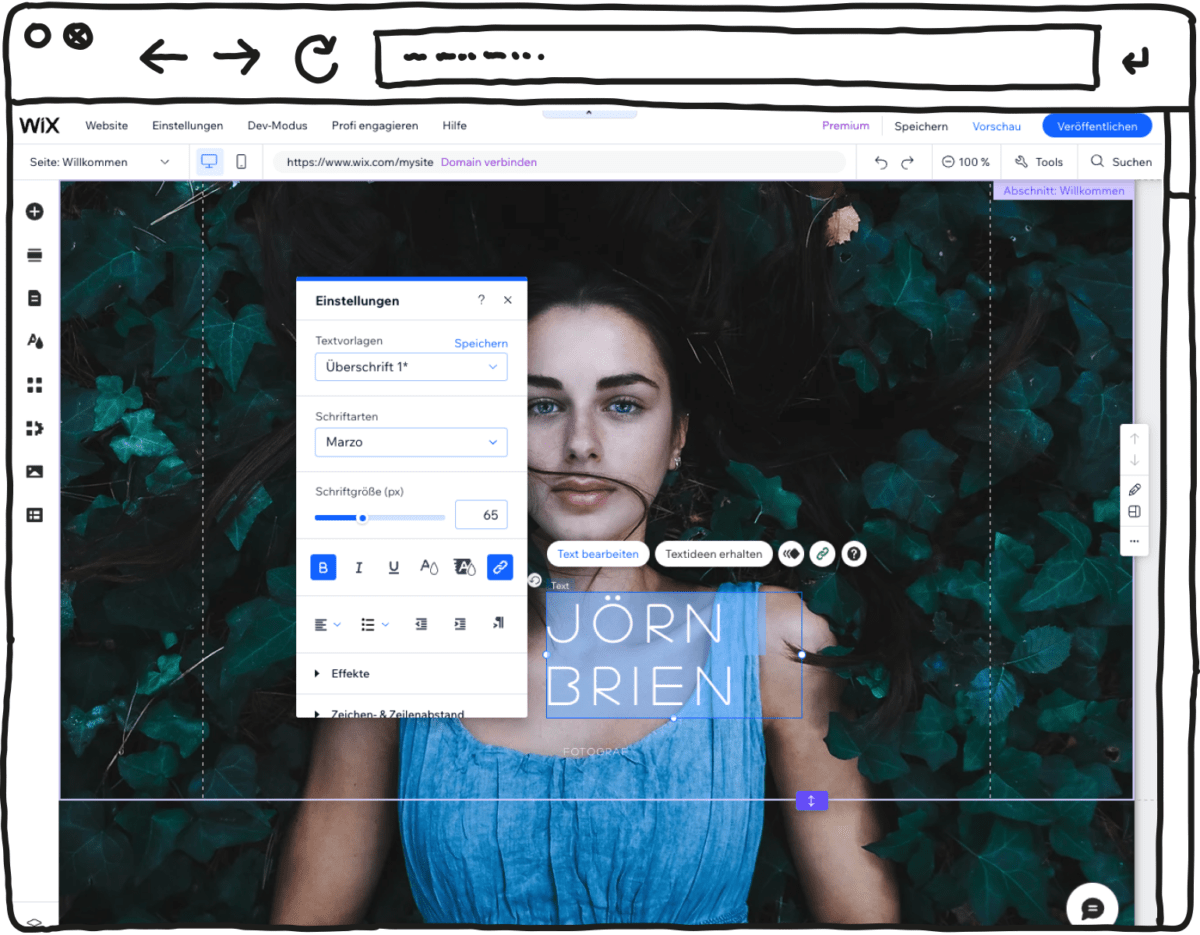
If you want to create a high-quality photographer website with little effort, a modern website builder is the right choice.
You can easily create your own photographer website yourself, whether you are a hobby photographer or a professional. Basic computer and Internet skills are all you need. You don’t need to be able to program.
The website builders offer numerous modular design templates created by web designers. You can edit and customize these directly in the browser using drag & drop.
The design templates also offer functions especially suitable for photographers, such as the option of displaying photos in galleries or albums. You can also easily integrate an online store and a password-protected customer area.
To present your offer and portfolio with your photographs on your website, use short, concise texts and – logically – expressive images.
All website builder providers also allow you to expand your website with additional functions such as a blog. This is a particularly popular option for hobby photography websites.
A virtual assistant helps you to create and publish your photography website.
You can use your own domain with a corresponding email address with all of the website builder providers presented here. Think about the name for your photography website in advance.
With WIX* and Jimdo*, you can publish free websites for photographers – albeit with a very limited range of functions. However, you can use this option to try out and test the building blocks without risk.
After publishing your website, the website builder will also help you with search engine optimization (SEO) and email marketing, for example.
How to design your photographer website with a website builder:
- Choose a website tool that works for you (overview below)
- Decide on a suitable template for your photographer website
- Edit the design so that it meets your expectations
- Add photos and text
- Publish your photographer website
Advantages and disadvantages of a website builder
- Very easy to get started, no programming knowledge required
- Website is online in no time
- Professionally created design templates enable professional results
- Affordable monthly rates
- Free tariffs or trial versions to try out
- Expandable with add-ons such as an online store or blog
- Support team to help with any problems
- Reaches its limits with complex websites
- Limited range of functions in the basic tariffs
- Expansion of the range of functions is subject to a fee
- Tied to one provider
Conclusion: A website builder is the right choice for simple, creative and professionally designed photographer websites.
With all the tools presented here, you will find the standard functions you need to optimise your photography portfolio and present yourself in the best possible light.
Squarespace: the website builder for design lovers

Squarespace makes it very easy to create a really slick design for a new website.
Once you’ve decided what kind of website you want and what your main goals are, the website builder presents you with a corresponding template. Editing is also easy.
Squarespace is the right choice for:
- Creatives such as designers or photographers
- Local companies that need a stylish website – with a blog and online shop
- Anyone who simply wants a professional, good-looking website
What I really liked about Squarespace:
- Easy to use and easy to get started thanks to the setup wizard
- Variety of stylish and mobile-optimised templates for all industries
- AI-supported text creation
- Access to millions of images
- Strong blog and online shop functions
What I think could be improved:
- Important add-ons like Email inbox or translations plugin are available but can cost extra
Get started with Squarespace – save 10%
SQUARESPACE offers various packages starting from €11/month. They also offer 14-day free test.
Tip: Enter the code “PARTNER10” when registering to save 10% during the first year!
The best website tools for photographers
How would you like to create your website? Here you will find a detailed comparison of all the providers I have tested:
-
1 Great design templates

Test score
8.7
2026
Very good
Pros and Cons
- Particularly stylish & mobile-optimised design templates
- Templates for every industry
- Integrated marketing and analysis tools
- Access to over 40 million images
- Comparatively few add-ons (or cost extra)
- Email inbox costs extra (via Google Workspace)
Visit sitePricing
- Squarespace Personal
- With your own domain
- from 11,00£ / month
- Test 14 days free of charge
-
2 Most flexible solution

Test score
8.2
2026
Very good
Pros and Cons
- Website builder with the greatest design freedom
- 800+ high-quality designs, 300+ app extensions
- AI assistant for website and content
- Several image databases integrated
- Range of functions can be overwhelming at first
- Email addresses only via Google Workspace (costs extra)
Visit sitePricing
- WIX Free
- Permanently free of charge
- Wix.com branding
- No own domain
- WIX Premium
- Advertising free
- With your own domain
- from £7.50 / month
- Test 14 days free of charge
-
3 Very easy to set up

Test score
7.1
2026
Good
Pros and Cons
- Website wizard that gets your page up and running in just a few minutes
- Attractive & mobile-optimised designs
- Functions rather limited to basics
- Few possibilities for extension
Visit sitePricing
- JIMDO Free
- Permanently free of charge
- Jimdo branding
- No own domain
- JIMDO Premium
- Advertising free
- With your own domain
- from 9,00£ / month
-
4 Ideal for beginners

Test score
6.8
2026
Good
Pros and Cons
- Very easy to set up
- Best results for simple websites
- AI assistant facilitates creation
- Image database with 17,000 photos
- Email inbox included in the tariff
- Rather not ideal for more complex websites
- Other providers offer more choice in design templates
Visit sitePricing
- IONOS MyWebsite Now
- Free from advertisements
- With your own domain & email
- from 1£ / month
-
5 Best value for money

Test score
6.3
2026
Good
Pros and Cons
- Very simple and beginner-friendly creation
- Designs optimised for mobile devices
- Free support
- Attractive Pro tariffs
- Selection of design templates is limited
- Functionality not as extensive in comparison (no app store)
Visit sitePricing
- Webador Free
- Permanently free of charge
- No own domain
- Webador banner on the page
- Webador Pro
- Incl. domain and email inbox
- Incl. online shop
- from £8.50 / month
- Test 3 months free of charge
Have you chosen your preferred tool? Then let’s register your desired domain!
A domain is the basic prerequisite for your photography website to be found on the Internet.
If visitors enter the main domain you have chosen (e.g. https://my-photography-homepage.co.uk) in the address bar of their browser, they will land on your website.
So choose the name for your photography website carefully. Other photographer websites can provide you with inspiration.
If you have already registered a main domain, you can link it to the website builder of your choice later. You can skip ahead to planning your website at this point.
I advise you to choose your own domain because you can also use it for your email communication. This looks more trustworthy and professional to potential customers.
Your email address could look like this: contact@my-photography-website.co.uk.
There are small monthly costs for registering and using a domain. These are already included in the website builder tariffs.
Some website builders offer a free tariff that can be used for test purposes.
Here you get a so-called subdomain instead of a main domain, which can look something like this: https://my-photography-website.wixsite.com.
I recommend that you register and use a main domain, regardless of whether you want to create a professional or hobby photography website.
Want a domain available? Check with your chosen website builder right away!
Tip: You can find all further information about domains and domain registration in my detailed guide to domain registration.
Have you found the right provider and the right domain? Then let’s start planning your photographer website.
Answer the following questions:
- What content and functions do visitors to your website expect?
- Where can you place this content and functions as sensibly as possible?
- What should the logical structure of your website look like?
Plan your website structure with the help of a sitemap
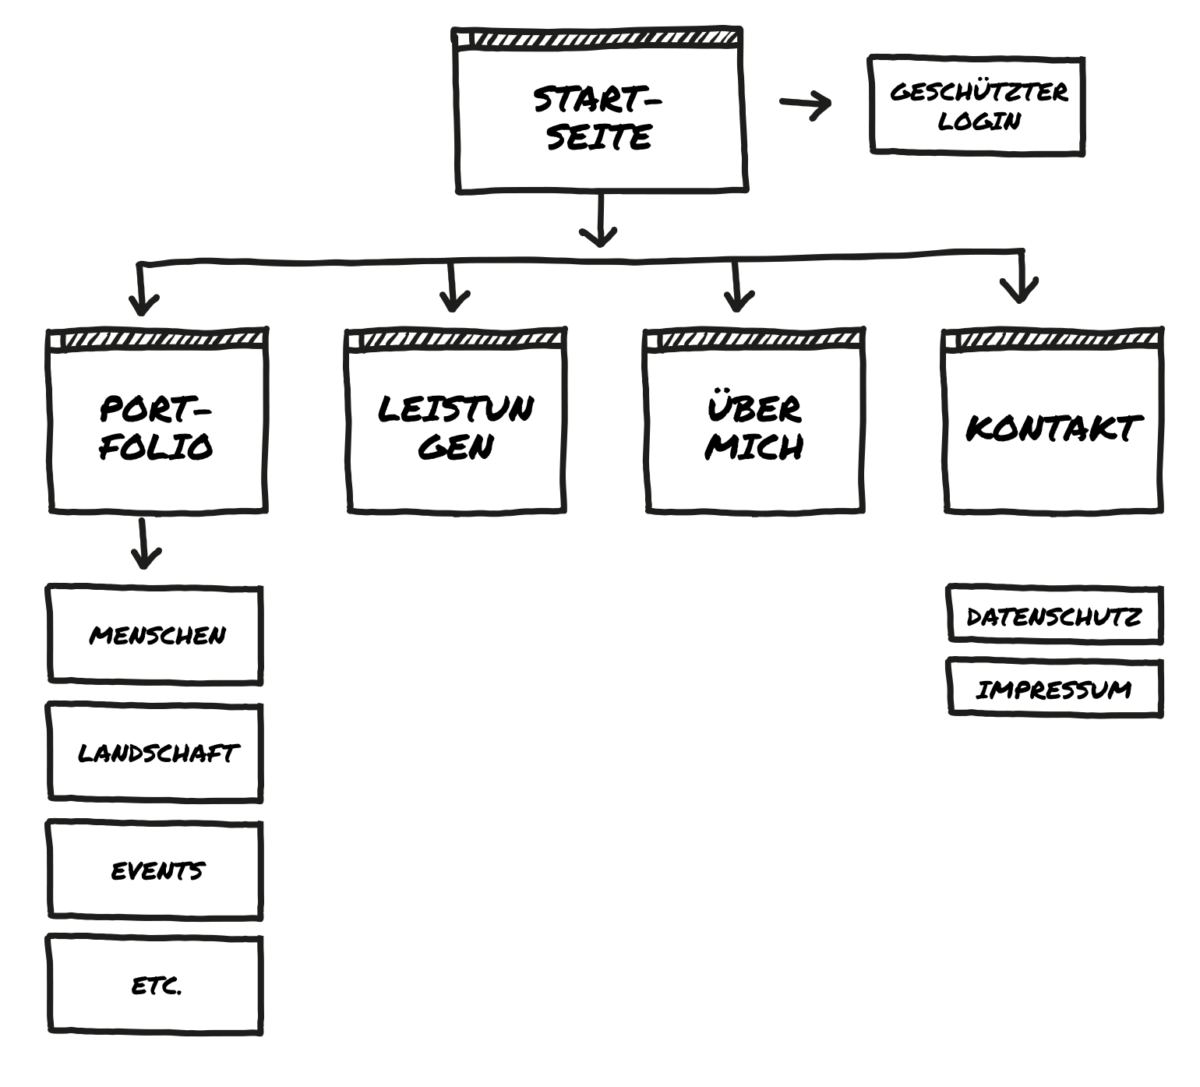
A sitemap helps you to visualize and define the logical structure of your website.
You can use a sheet of paper or your computer to create your sitemap:
- Level 1: Homepage
- Level 2: 5-7 main menu items (e.g. Gallery, Vita, Services, Contact)
- Level 3: Detailed pages to divide up extensive website topics
You should only add further levels if you are planning a complex website. This is not necessary for a simple photographer’s website.
When you start designing your website in the website builder of your choice, you can transfer the structure you have created here.
Always needed: Legal and mandatory information
The legal notice on your photography website should include your name, address, telephone number and email address. For professional service providers, additional information such as the VAT ID number or the responsible registration court may be required.
You can use online tools to help you create your legal notice and privacy policy.

Let’s start with the design of your website.
With a website builder, you work with design templates, also called themes. This ensures that the different pages of your website have a consistent design. The layout also remains the same.
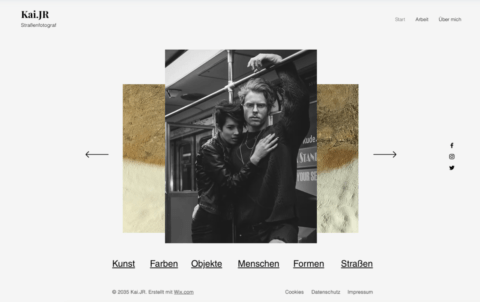
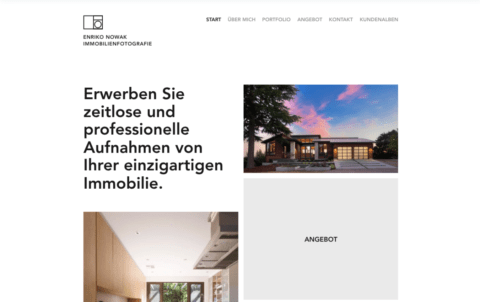
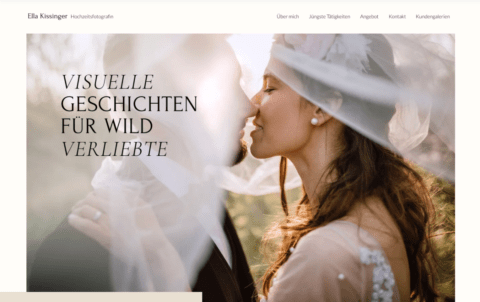
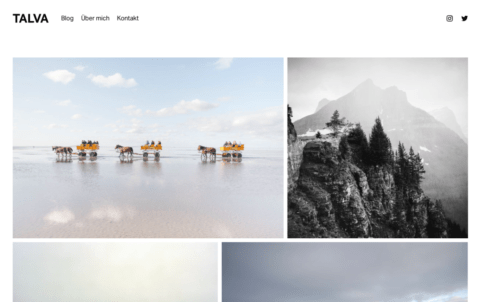
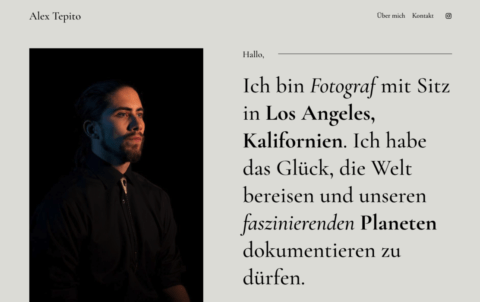
You will find many templates specially developed for photography websites in the website builders. These can be customised to make your website distinctive and unique. You can add a logo and change colours and fonts.
The themes are so diverse and flexible that you will always find a template for your website that meets your wishes and ideas.
5 themes that are specially tailored to the requirements of photographers
The large selection can quickly overwhelm you. That’s why I’ve picked out five themes that are ideal for a photographer’s website.
You can find many more suitable design templates from the modular system providers. If you don’t like my five suggestions, you can have a good look around there.
You can do your own research in the theme libraries of the individual providers here:
- Squarespace*(website templates)
- WIX*(Website > Website Templates section)
- Jimdo* doesn’t have a theme library, instead a setup wizard will give you suitable design suggestions.
Now that you’ve found your theme, I’ll show you how to customise it in the next step.
Customise your design template – on Wix, Squarespace and Jimdo

Once you have decided on a template that matches your photographer website, you can start designing the pages.
Start with the website structure. Take the prepared sitemap and add the main menu items to your website (gallery, services, CV, etc.).
Check how your website will look by clicking on the preview button. Also pay attention to the view on your cell phone.
Use text and images to convince your visitors
Your photographs should take center stage on your homepage. Present your photographer portfolio on your website in a gallery or album.
The photos should look high quality and reflect you and your style. Also use your own images to illustrate your services.
Spice up your images and your services with meaningful but short texts. Don’t forget: website visitors tend to be put off by texts that are too long.
How exciting! Your photo website is going online!
You’re just a few moments away from publishing your self-made website. The site is as good as finished. Exciting, isn’t it?
With one click on the “Publish” button you could put your site online immediately.
But wait! Take a few more minutes to check a few important things.
Work through the short checklist. Then you’ll be on the safe side as far as the functioning of your website is concerned.
Check these 4 points before publishing:
- Functionality: Are all links active and do the interactive elements work?
- Browser: Is everything right with the display of your site in Chrome, Safari and Firefox as well as on mobile phones?
- Feedback: Have friends and family tried out your website? Did they notice anything else? What do they think of the name of your photography website?
- Google search: Have you completed the SEO settings (page title, preview texts)? You can also find these in your website builder.
Congratulations! Your photography website is live!
Now just click the “Publish” button and you’ve done it: your website is online. You have successfully developed the website. Congratulations on your work. You should be proud of yourself!
What do you think of your photography website? Do you like the name? Is everything as you imagined it? How did you like my tutorial?
I look forward to your feedback in the comments section.
Creating and operating a photography website doesn’t cost much. How much the website actually costs depends on the method you use to create it and how extensive you want it to be. If you use a website builder such as WIX* or Jimdo*, you can get started for just a few euros per month. The costs for domain and web hosting are already included in the tariffs of the construction kits.
For a photography website – including domain and web hosting – you pay a few euros per month if you create the website yourself. The easiest way to do this is with a modular system. You will incur one-off costs if you commission an external service provider to create the site or individual website content. The modular systems also offer the option of operating a website free of charge. However, you should only do this for test purposes.
It is possible to create and – permanently – publish a photography website for free. Website builders such as WIX* and Jimdo* have their own free plans for this. However, you do not have your own main domain. The providers also display annoying advertising. This does not look professional and is primarily recommended for testing purposes.
Creating your own photography website is not difficult. Quite the opposite! If you use a website builder such as WIX* or Jimdo*, you only need basic computer skills. The flexible design templates available with these systems make website design child’s play. You can find all the information you need in my step-by-step guide to creating a website for beginners.
In short: it depends. With the help of a website builder, a simple photography website can be ready within a day. Creating a more complex website can take several days or even a few weeks. If you want to have your photography website created from scratch by an external service provider, it can take even longer.
Follow these 7 tips to optimize the creation of your photography website:
- Decide on the type of photography website
- Choose a provider
- Create a sitemap to visualize the website structure
- Choose a template that suits you
- Ensure high loading speed and optimal display on cell phones
- Use short, precise texts and meaningful images
- Integrate an imprint and privacy policy into your pages
Yes, the EU’s GDPR (General Data Protection Regulation) also applies to photographers’ websites. This means that as a photographer operating a website, you must comply with the relevant provisions. This includes informing your visitors in a privacy policy if you collect and process personal data.
Of course, you can also create a website for photographers with WordPress. For beginners, however, I recommend using a website builder such as WIX* or Jimdo*. These allow you to create websites quickly and easily with the help of a setup wizard. There are also lots of flexible design templates – including some that have been specially developed for photographers.
This might also interest you
- Create a photography website in 4 easy steps (2026) Read article
- Create a portfolio website in 4 easy steps (2026) Read article
- How to create a website: The complete guide for beginners Read article
- How to create a blog: 4 easy steps for beginners Read article
- KompoZer – Download, extensions & project background Read article
- School website design: 4 simple steps (2026) Read article


Comments and ratings
Was this article helpful?
Rate article
Share article