Creating a website for beginners (2026)

As seen in:
Top 3 beginner-friendly website tools
-
Visit site
Test score
9.4
2026
Outstanding
-
Visit site
Test score
8.5
2026
Excellent
-
Visit site
Test score
7.9
2026
Very good
You want to create your own website or a simple homepage, but you’re not quite sure how to start?
You’re in the right place.
It doesn’t matter whether the site is for personal use, your business or a community project. Your budget isn’t a barrier either.
In this guide, I’ll walk you through the easiest and most practical ways to create a website, covering both free and paid options.
And don’t worry: you can launch a professional-looking site for well under £10 per month.
With this step-by-step guide, you’ll learn how to create a website and get your own homepage online in no time.
Ready to get started? Let’s go.
How to create your own website:
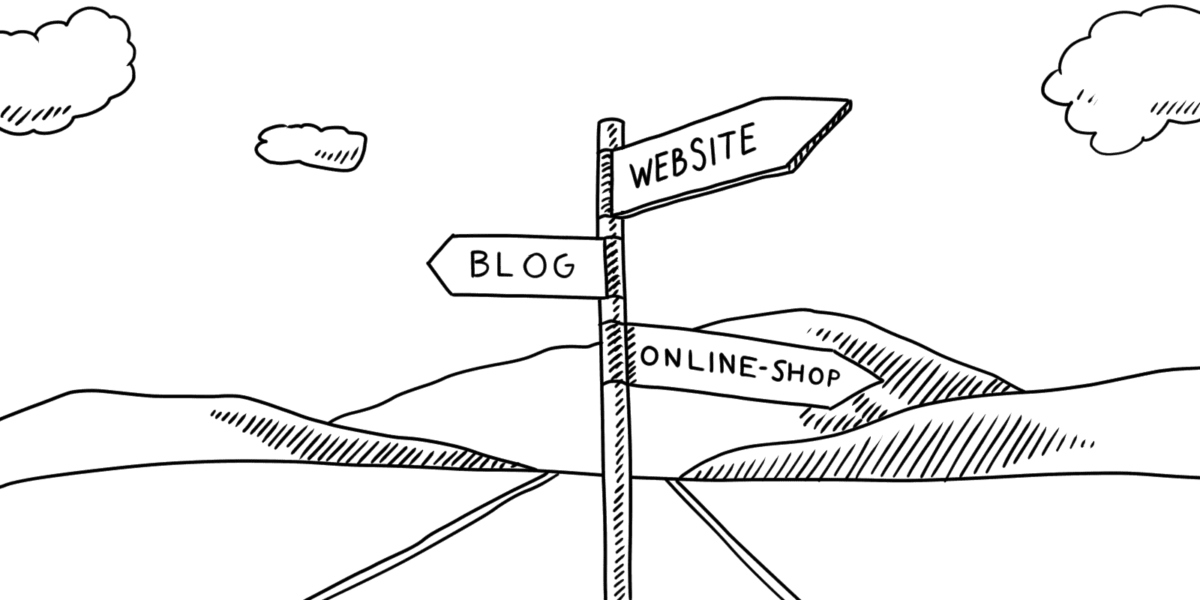
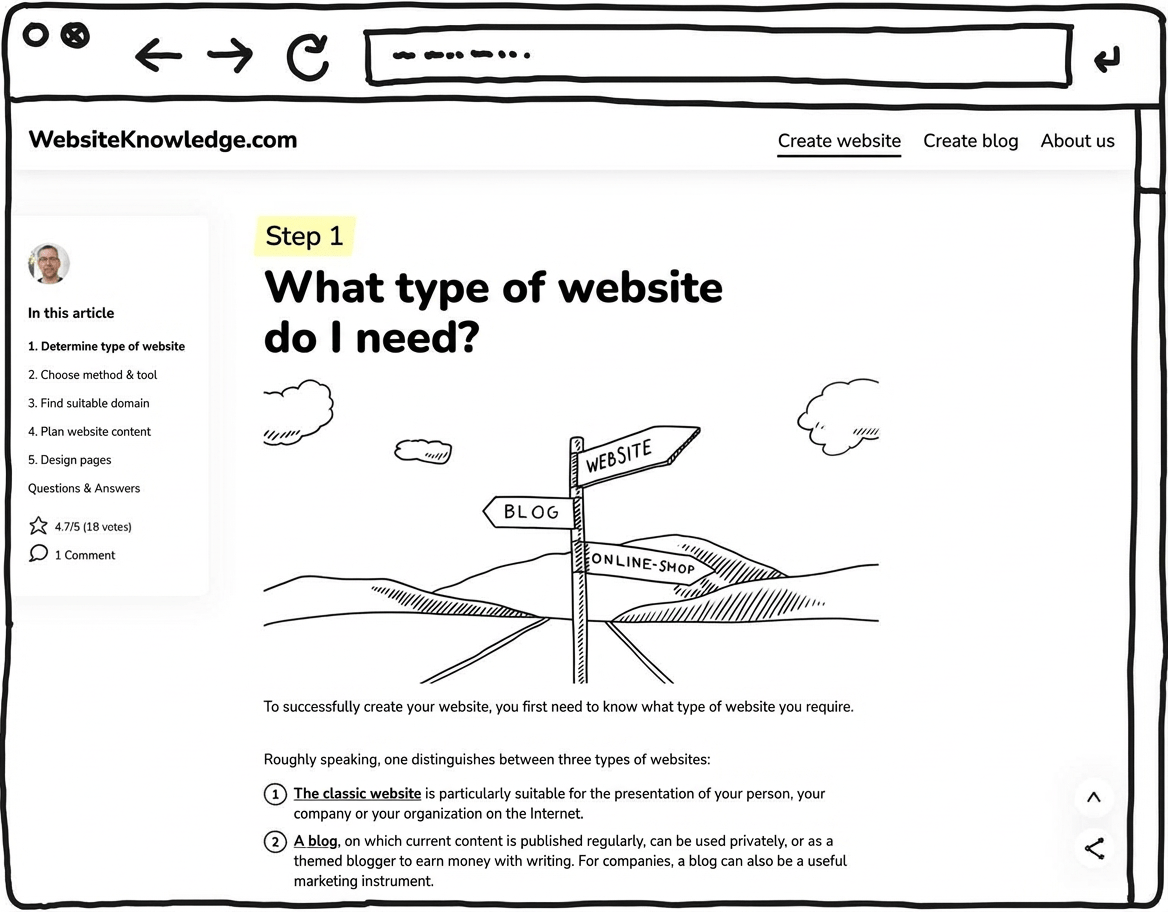
Before you can successfully create a website, you should be clear about the type of site you want to build.
In general, there are three main categories:
- A classic website is ideal if you want to present yourself, your business or your organisation online.
- A blog is designed for publishing regular updates. It can be used privately, as a way to earn money through writing, or as a useful marketing channel for businesses.
- An online shop allows you to display and sell products on the internet.
I’ll explain each type in more detail in a moment.
Of course, you can also combine elements – for example, a business website with a blog, or a blog that includes a small shop.
For now, though, it’s best to focus on your main goal. This makes it much easier to choose the right website tool. Once your site is live, you can always expand it later.
Classic Website
A classic website is the right choice if your goal is to present yourself, your club or your business online.
For most companies, a website is now their most important digital presence. It has become a basic element of modern marketing.
Your site gives potential clients and new customers a place to learn about you, your goals and the services or products you offer.
Creating your own website — or having one built for you — also means you can be found through search engines such as Google.
A classic website can be anything from a simple one-page landing page or digital business card to a larger site with 20, 30 or more subpages.
Building a website is easy to learn. A small site with just a few pages can be created within a few hours.
Most of the content — text, images, your logo and contact details — stays relevant for a long time and only needs occasional updates.
Standard website: best if …
- you want to present yourself or your business professionally online
- you want to promote your offer effectively
- you want to attract prospective customers or new clients
- your website needs to be live within a few hours
- you want to keep the ongoing effort of maintaining the site manageable
Blog
A blog is a kind of online diary. The word “blog” is short for “web log”, combining “web” (the internet) and “logbook”.
Unlike a traditional website, a blog doesn’t just consist of a few static pages. Instead, it publishes articles regularly, usually arranged in chronological order.
Another typical feature is the built-in comment section, which invites visitors to engage with the author and join the conversation.
While blogs were originally used mainly by private individuals to share thoughts and experiences — often in diary form with photos or videos — the range of uses has expanded significantly.
Today, creatives, athletes, and book or travel enthusiasts blog to update others on their projects or hobbies — and, ideally, to generate a passive income through advertising revenue.
Businesses can use a blog as a digital channel too, for example to position themselves as experts in their field.
A blog can also be a section within a larger, more traditional website.
Blog: best if …
- you have something to share on a regular basis
- you want to present yourself as an expert in a specific topic area
- you want to interact with visitors
- you want to generate a passive income
In this article, I’ll show you how to create your blog using WordPress.
Online-Shop
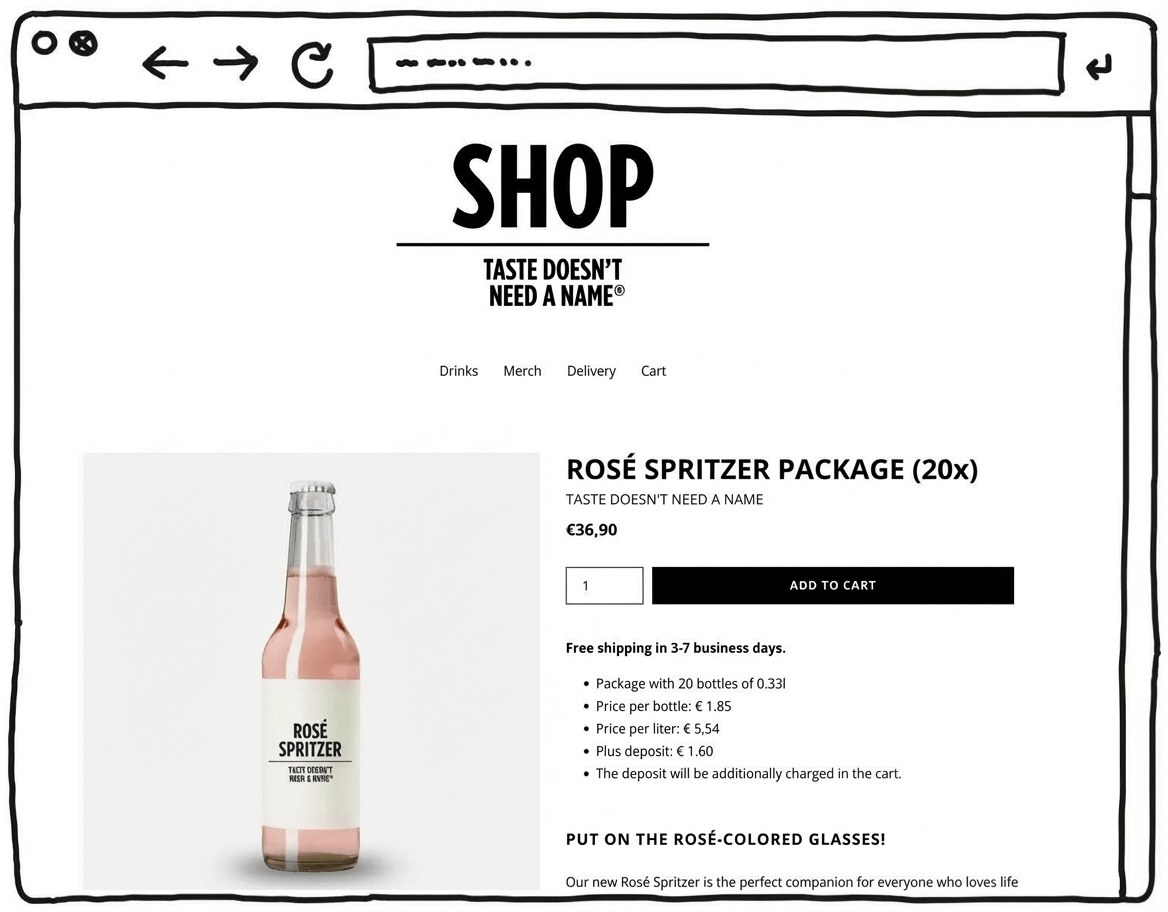
If you want to create a website primarily to sell products or services, you’ll need an online shop.
Thanks to easy-to-set-up shop systems, even beginners can benefit from the e-commerce trend and manage an online shop from their desk at home.
You can also reach a much wider audience online — for example across the UK or Europe. On top of that, targeted online marketing can help you attract new customers.
What really matters is building trust with potential buyers. For that, high-quality images and clear, informative descriptions are essential.
An alternative is selling through marketplaces such as Amazon or Etsy, where you can list your products.
You do benefit from their large reach, but it comes at a cost: these platforms charge sellers significant fees, which can make your online business less profitable than running your own shop.
Plus, the competition is always just one click away.
That’s why building your own online shop is becoming increasingly important for long-term success in e-commerce.
Online shop: best if …
- you want to sell your products online
- you want to reach new buyers
- you want to sell independently of large platforms like Amazon, Etsy and others
Before you start building your own website, you need to clarify which method is the right fit for you.
So, how do you create a website?
Put simply, there are five main ways to build a website:
- Website builder – ideal for beginners
- WordPress (or another CMS) – for blogs and more complex website projects
- Online shop system – for selling online
- Having a website made for you – straightforward, but expensive
- Coding a website yourself – only for professionals
In the sections below, I’ll take a closer look at methods 1–4 so you can choose the option that suits you best.
Method 1: Website builder
Modern website builders are usually the best choice for creating a standard website. They let you learn how to build a website quickly.
A few years ago, many builder systems were slow and sometimes a bit clunky. By now, they’ve become much more mature and offer professional solutions for most typical use cases.
You also don’t need a large budget.
You don’t need technical knowledge or a programming language to build a website.
That’s because these tools are based on modular design templates created by professional web designers.
With just a few clicks, you can put everything together to fit your project — using drag and drop and simple text editing, directly in your web browser.
Your website should present you and your services clearly. So what you need to provide yourself are good texts and strong, meaningful photos.
If you want to expand the site later, most website builders also allow you to add blog and online shop features.
After publishing, you can use the website creator to work on search engine optimisation (SEO) and marketing as well.
Many tools also include a virtual assistant that guides you through the structure and design of your new website.
Website builder: setup steps
- Choose a tool that suits you (I’ll introduce the best website builder tools in a moment)
- Pick a suitable website design template (template/theme)
- Adjust the design to match your preferences or brand
- Create your homepage with photos and text
- Publish your website
Pros & cons of a website builder
- Very easy to get started
- no coding skills required
- your website can be live in a very short time
- convenient editing with a drag-and-drop editor
- professionally designed website templates
- affordable monthly plans
- free website creation via entry-level versions
- can be expanded with add-ons such as an online shop or member areas
- usually support is available in your language
- Reaches its limits with more complex websites
- limited features in the basic plans
- expanding functionality is usually paid
- lock-in to a single tool
Conclusion: With a website builder, you’re in good hands for a website project of simple to medium complexity.
Only if you have particularly complex requirements or you’re technically confident would I recommend a CMS such as WordPress (Method 2).
Recommended website builders
-
1 Winner 2026

Test score
9.4
2026
Outstanding
Pros and Cons
- WordPress securely installed with 1 click
- Control over functions and data
- Huge range of extensions and designs
- Automatic updates and backups
- Using WordPress is more complicated than a website builder
Visit sitePricing
- IONOS WordPress
- Fast server hardware
- Incl. domain & email addresses
- From £1 / month
- 30 days money back
-
2 Ideal for beginners

Test score
8.5
2026
Excellent
Pros and Cons
- Very easy to set up
- Best results for simple websites
- AI assistant facilitates creation
- Image database with 17,000 photos
- Email inbox included in the tariff
- Rather not ideal for more complex websites
- Other providers offer more choice in design templates
Visit sitePricing
- IONOS MyWebsite Now
- Free from advertisements
- With your own domain & email
- from 1£ / month
-
3 Best value for money

Test score
7.9
2026
Very good
Pros and Cons
- Very simple and beginner-friendly creation
- Designs optimised for mobile devices
- Free support
- Attractive Pro tariffs
- Selection of design templates is limited
- Functionality not as extensive in comparison (no app store)
Visit sitePricing
- Webador Free
- Permanently free of charge
- No own domain
- Webador banner on the page
- Webador Pro
- Incl. domain and email inbox
- Incl. online shop
- from £8.50 / month
- Test 3 months free of charge
-
4 Very easy to set up

Test score
7.3
2026
Very good
Pros and Cons
- Website wizard that gets your page up and running in just a few minutes
- Attractive & mobile-optimised designs
- Functions rather limited to basics
- Few possibilities for extension
Visit sitePricing
- JIMDO Free
- Permanently free of charge
- Jimdo branding
- No own domain
- JIMDO Premium
- Advertising free
- With your own domain
- from 9,00£ / month
-
5 Most flexible solution

Test score
7
2026
Very good
Pros and Cons
- Website builder with the greatest design freedom
- 800+ high-quality designs, 300+ app extensions
- AI assistant for website and content
- Several image databases integrated
- Range of functions can be overwhelming at first
- Email addresses only via Google Workspace (costs extra)
Visit sitePricing
- WIX Free
- Permanently free of charge
- Wix.com branding
- No own domain
- WIX Premium
- Advertising free
- With your own domain
- from £7.50 / month
- Test 14 days free of charge
-
6 Great design templates

Test score
6.8
2026
Good
Pros and Cons
- Particularly stylish & mobile-optimised design templates
- Templates for every industry
- Integrated marketing and analysis tools
- Access to over 40 million images
- Comparatively few add-ons (or cost extra)
- Email inbox costs extra (via Google Workspace)
Visit sitePricing
- Squarespace Personal
- With your own domain
- from 11,00£ / month
- Test 14 days free of charge
Method 2: WordPress
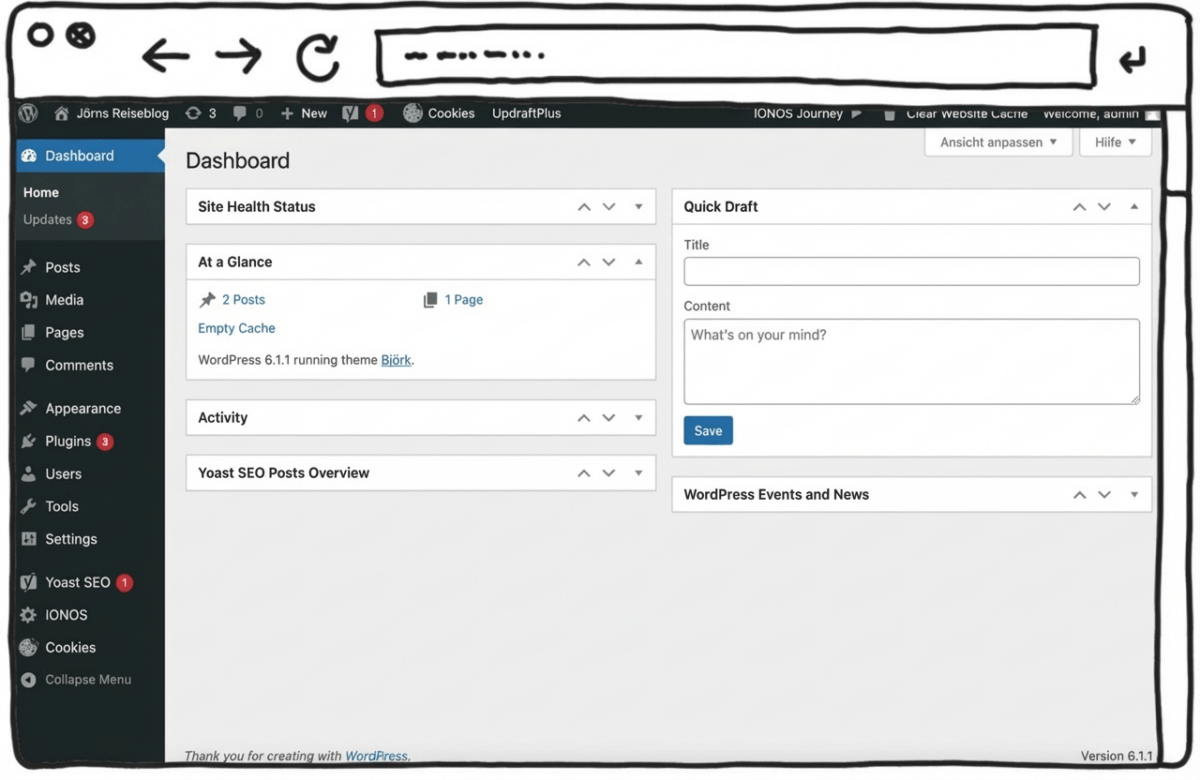
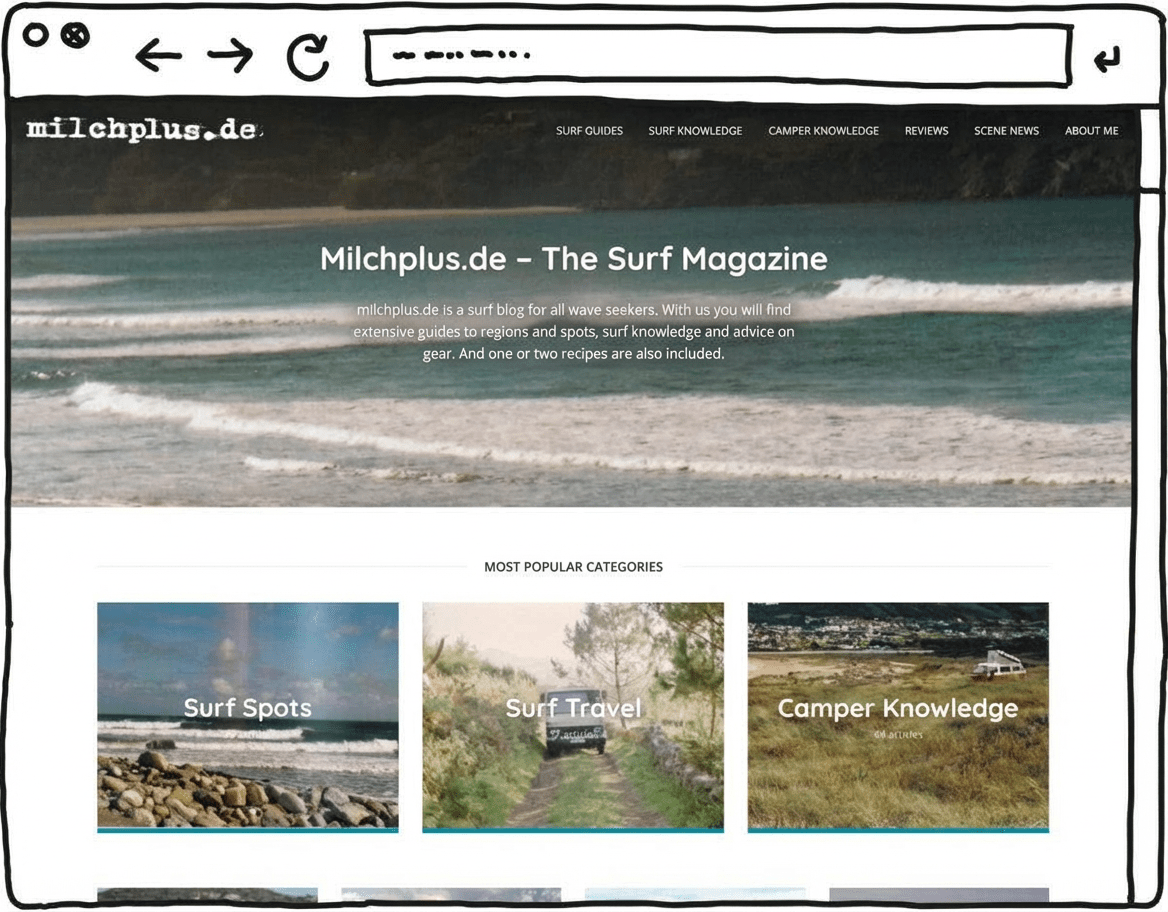
WordPress is the world’s most widely used content management system (CMS). It powers over 40% of websites worldwide, and is especially popular for creating blogs. We also run “websiteadvisor.co.uk” using WordPress.
Originally launched as a blogging platform, WordPress has developed into a powerful tool for building websites.
Behind WordPress is a large community that creates ready-made design templates (known as themes) and plugins that add extra features.
Unlike a website builder, WordPress lets you customise a site much more freely — for example using widgets and plugins, or even by editing the HTML and CSS code directly.
That flexibility is also the main challenge with WordPress: because you can do so much, you usually need more time to learn how everything works.
WordPress: setup steps
- Choose suitable WordPress hosting — ideally a WordPress host that offers one-click installation
- Configure the basic settings of your WordPress installation
- Pick a theme that suits your needs
- Adjust the design to match your preferences or brand
- Create the individual pages and link them in the menu
- Build your website layout with photos and text
- Add extra features as needed using plugins
Pros & cons of WordPress
- WordPress itself is free — you only pay for website hosting
- a wide range of design templates (themes) and add-ons (plugins)
- strong built-in blog features plus a comments function
- a very large community and plenty of tutorials
- high flexibility and full control over your own data
- and because it’s so widely used you can find many service providers who can help if you run into problems
- More time to learn than with website builders
- No dedicated customer support
- Premium themes and plugins are often paid
- Complex features like online shops are possible, but can be hard for beginners to manage
- More admin work (setup and updates)
- Outdated WordPress installations and plugins can be vulnerable to hacking
In short: WordPress is the better choice if you mainly want to blog professionally or build a more complex, professional website.
Best WordPress hosting tools
I’ve tested the most important WordPress hosting tools in detail and summarised my ratings for you here:
-
1 Winner 2026
Test score
9.4
2026
Outstanding
Pros and Cons
- WordPress securely installed with 1 click
- Control over functions and data
- Huge range of extensions and designs
- Automatic updates and backups
- Using WordPress is more complicated than a website builder
Visit sitePricing
- IONOS WordPress
- Fast server hardware
- Incl. domain & email addresses
- From £1 / month
- 30 days money back
-
2 Fast premium hosting

Test score
8,8
2026
Excellent
Pros and Cons
-
Powerful servers
-
Very fast loading times
-
Free automatic updates and backups
-
Includes staging environment, CDN and more
-
Automated setup and migration
-
24/7 expert support
-
More expensive than the test winner in comparison
-
No built-in AI setup
Visit sitePricing
- Siteground “StartUp”
- Includes domain and email inbox
- Up to approx. 10,000 visitors per month
- 30-day money-back guarantee
- From £2.99 / month for the first year, then £15.99 / month
-
-
3 Best value for money

Test score
7,9
2026
Very good
Pros and Cons
-
Unlimited bandwidth
-
Includes AI WordPress builder
-
Free pre-built templates
-
WordPress-optimised server environment
-
LiteSpeed web server and the LSCWP Cache plugin
-
Free CDN from the “Business” plan
-
Free automated website migration
-
More expensive than the test winner in comparison
-
Automatic backups available only on a weekly basis
Visit sitePricing
- Tarif “Premium”
- For approx. 25,000 visitors per month
- Includes domain and email inbox
- From £2.79 per month for the first two years
- 30-day money-back guarantee
-
-
4 Hosting with page builder

Test score
7
2026
Very good
Pros and Cons
-
All-in-one solution for WordPress
-
Includes Elementor page builder
-
Includes Elementor AI tools
-
Access to over 100 professional themes
-
Managed WordPress with staging environment, backups and updates
-
Free migration of existing WordPress websites
-
Relatively expensive in comparison
-
Mainly worthwhile if you specifically want to use the Elementor page builder
Visit sitePricing
- Plan “Host Cloud”
- Includes domain and email inbox
- Pro version of the Elementor builder
- Free website migration
- From £14.99 per month
-
Method 3: Online shop
If you want to add a simple online shop module to an otherwise straightforward website, you can often do that with the usual website builders.
But if e-commerce is your main focus, a dedicated online shop system is the better choice for creating your web shop.
Similar to website builders, you can set up a more advanced online shop here with just a few clicks. Free themes are usually available, too.
The most popular tool for online shop systems is Shopify.
With Shopify, many features that make building an online shop easier are included.
Shopify works like a central dashboard for your shop. You can manage everything from stock and order processing to basic bookkeeping tasks and marketing — all in one place.
You can also set up a blog, start email marketing, or use discount codes to attract customers.
Just like with website builders, you don’t need to code a homepage with Shopify. No programming skills are required to create a web shop, and signup, setup, and everyday use are generally straightforward.
If you want to expand later, there’s an app store with additional features. For businesses with a physical location, Shopify POS can help you manage in-person sales as well.
If you just want to try it out first, you can test it free for 14 days.
Online shop: setup steps
- Create an account with the tool of your choice
- Choose a suitable theme
- Customise your shop to match your brand
- Add products and product categories
- Configure the settings (payments, shipping, tax, notifications)
- Add pages with background information, a blog, and legal information
- Publish your online shop
Recommended online shop tools
Here you’ll find the online shop tools I’ve tested in my detailed shop system comparison.
-
1 Winner 2026

Test score
9.1
2026
Outstanding
Pros and Cons
-
Comprehensive online shop for all industries
-
High-quality shop designs
-
Quick setup
-
Highly flexible and expandable
-
Convenient order processing
- Extensions often come at an additional cost
Visit sitePricing
- Shopify Basic
- Unlimited products
- Online shop and additional sales channels
- Secure payments
- From £27 per month
- 14-day free trial
-
-
2 Best value for money

Test score
7.9
2026
Very good
Pros and Cons
-
WooCommerce securely installed in one click
-
Full control over features and data
-
Extensive range of extensions and design themes
-
Automatic updates and backups
- Using WooCommerce is more complex than website builder systems
Visit sitePricing
- IONOS WooCommerce
- Pre-installed WooCommerce plugin
- Automatic updates and backups
- High-performance server hardware
- Includes domain and email inbox
- From £1 per month
- 30-day money-back guarantee
-
-
3 Very easy to set up
Test score
7.9
2026
Very good
Pros and Cons
- Convenient setup
- Google Shopping and Facebook Ads
- Build it yourself or work with a designer
- Less suitable for larger online shops
- Other tools offer a wider range of shop designs
Visit sitePricing
- IONOS Shop Plus
- Up to 5,000 products
- With a dedicated personal advisor
- Includes domain and email inbox
- From £1 per month
-
4 For simple online shops
Test score
8.5
2026
Excellent
Pros and Cons
-
Very easy and beginner-friendly setup
-
Mobile-optimised designs
-
Affordable Pro plans
- Limited selection of design templates
- Features not as comprehensive in comparison (no app store)
Visit sitePricing
- Webador Free
- Permanently free
- No custom domain
- Webador banner displayed on the site
- Webador Pro
- Includes domain and email inbox
- Includes online shop
- From £4.50 / month
- 6-month free trial
-
-
5 Flexible shop builder

Test score
6,6
2026
Good
Pros and Cons
- Only online shop with AI setup
- Wide selection of high-quality designs
- Very flexible customisation
- Clear, user-friendly shop dashboard
- Reaches its limits with larger online shops
Visit sitePricing
- WIX Core
- From £26.80 / month
- For physical and digital products
- Up to 50,000 products in the shop
Method 4: Hire a web designer
If you don’t have the time or motivation to build your website yourself, you can hire a professional instead.
There’s a wide range of providers who create professional websites for small businesses or community organisations, for example:
- Local web designers or freelancers
- Online service providers who work with many clients at once
- Small or large marketing agencies
The cost of having a website built can vary a lot.
Depending on the provider’s level of experience, their typical client base, and what you want, prices can range from a few hundred to many thousands of pounds.
It’s useful to know that web designers usually rely on one of the systems mentioned above — a website builder, WordPress, or an online shop system.
That makes sense, because it means you can often update the finished site yourself later on.
Many website builder tools also offer the option to book a web designer through their platform — often someone who specialises in that specific builder.
Whichever type of provider you choose, you should have a clear idea of what you want. That’s the only way to judge an offer properly.
Ask yourself whether everything you need is included, and what ongoing costs you might face — for example hosting, a domain name, or future updates.
Even if you have your site built for you, you may still need to supply things like text and images.
Hire a designer: next steps
- Write down your wishes and requirements. (What should your website look like? How much content do you have? Will the site be multilingual? Which additional features do you need? What budget do you have?)
- Look for a web designer who fits your needs.
- Check the experience, portfolio, and technical skills of your shortlisted candidates.
- Agree on the terms. (Do you need to supply images and text? What do later changes cost? What’s the timeline?)
- Ask to see interim versions for approval so you can steer the result.
Pros & cons of hiring a designer
- Less time required
- no need to deal with the details of a website builder or CMS
- creative and modern design with high implementation quality if you find a good designer
- solid advice on which content and features you really need and how they should be used
- Significantly higher costs than building the site yourself
- paid changes and add-ons later on — especially if you don’t know exactly what you need at the start
- as a layperson it’s often hard to assess a provider’s professionalism and quality
- possible waiting times — good web designers are often booked up
- cheaper offers are usually “off the shelf” and offer little flexibility
Tip: You can still benefit from the advantages of a website builder even if you have professionals build your site for you. Ask the provider which builder or CMS they work with.
A domain is a website address, for example:
websiteadvisor.co.uk
People use your domain to reach the website you’ve created online.
A subdomain is part of a main domain and could look like this:
websiteadvisor.yourdomain.com
You often get a subdomain with free plans from website builder tools, for example with Jimdo:
yoursite.jimdo.com
A subdomain can be enough for a personal website. But if you want to use the site for a business, an organisation, or a blog, I’d recommend using your own main domain.
A domain like YourBusinessName.co.uk is easier to remember and looks much more professional.
It also allows you to communicate professionally by email with customers and business contacts using your own address (contact@YourBusinessName.co.uk).
A domain isn’t completely free, but it usually doesn’t cost a fortune.
With many paid website builder plans, the domain and hosting are often included. You can also connect a domain you already own.
Domain name checklist
Choosing the right domain is an important building block for creating a successful website.
So it’s worth taking your time when coming up with a name. After all, the goal is usually to keep the domain for the long term.
For search engine rankings, the domain name is only one factor among many. However, the domain extension and relevant keywords can have a positive impact.
Stick to these rules:
- Choose a short domain name (ideally no more than 20 characters)
- Steer clear of hard-to-understand words or unusual spellings
- Make sure the domain name fits your business
- Don’t use other brands’ or company names (risk of trademark/copyright issues)
- Take your time and test your favourites with friends and people you know
You can change a domain later, but it takes effort and can cost you customers and positions in Google search results.
Which domain extension should I choose?
Choosing a domain extension is an important decision. The extension gives both people and search engines a useful clue about what your site is about and who it’s for.
These are three common types of domain extensions:
-
Country-specific domains (.co.uk, .uk, .ie, etc.)
-
International domains (.com, .net, .org)
-
Topic- or location-specific domains (.biz, .info, .london, etc.)
I’d recommend choosing an extension from categories 1 or 2. If your business mainly targets the UK, .co.uk or .uk are usually the most sensible options — they’re familiar and easy to remember. If you’re aiming for a more international audience, .com can be a strong alternative.
The .com extension is the most widely used domain ending on the internet. That popularity means short, memorable names are often already taken — but it also means .com is recognised almost everywhere.
A country-specific extension like .co.uk or .uk makes sense when you primarily want to reach people in your own country. For many UK users, a UK domain can feel more local and trustworthy.
If your preferred name is available, you can also register it with multiple extensions to avoid confusion and protect your brand.
Using your own name as a domain (for example, joern-brien.com) can be a sensible option. I use a domain like this for my own website, where I present my services and what I offer.
For personal websites — or businesses and topics that are strongly centred on an individual — a domain based on your name can work well. This is common for sole traders, coaches, or designers.
On the other hand, it ties the website closely to you as a person. That can become an issue if you ever want to sell the site or the business later on. For a successor, a name-based domain may be hard to reuse.
In most cases, your name doesn’t include any search terms that are related to what your website is about.
A domain that includes your main search terms can still offer SEO advantages. If your domain is only your name, you may be missing out on that potential benefit.
“www” stands for the World Wide Web and traditionally refers to the main web address of a domain. The World Wide Web is a system of web pages accessed through the internet, first developed in 1989.
The “www” subdomain in front of a domain name isn’t strictly necessary. A domain can usually be written with or without “www”. Your website builder tool or WordPress host will typically set up both versions.
Visitors should be able to reach your site whether they type “www” or not. Still, it’s worth checking after registration to make sure both versions work properly.
“http://” (Hypertext Transfer Protocol) is the technical protocol used to transfer data on the web in plain text.
“https://” (Hypertext Transfer Protocol Secure) is the secure version of http. It adds encryption through SSL/TLS certificates, creating a protected connection for data transfer.
For most common tools and hosts, the SSL certificate is registered and set up for you.
Today, websites should be run only with “https://”, because it protects data and is widely expected by users and browsers.
How to register a domain
It’s a good idea to register your preferred domain as early as possible. That way, you secure it.
The simplest option is to register the domain with the tool you plan to use — either your website builder provider or the host where you’ll run WordPress.
You can also transfer the domain later if you decide to switch to another provider.
Check with your preferred provider whether your chosen domain name is still available:
Before you register a domain, you should check whether the name could infringe someone else’s trademark.
A trademark issue can exist if there’s a risk of confusion. The trademark and the domain don’t have to be identical — in the same sector, a similar name can be enough.
Avoid using celebrity names or the names of well-known companies and brands. It’s also best to stay away from deliberate misspellings (typo domains).
If you infringe a trademark, the rights holder may demand that you stop using the name and may also seek damages.
Check your domain name using a trademark search tool. For the UK, the UK Intellectual Property Office (UK IPO) provides a trade mark search, and you can also use broader databases such as TMview (EU) or WIPO’s Global Brand Database.
You can also register your own domain name as a trademark — often as a word mark — if that fits your plans and budget.
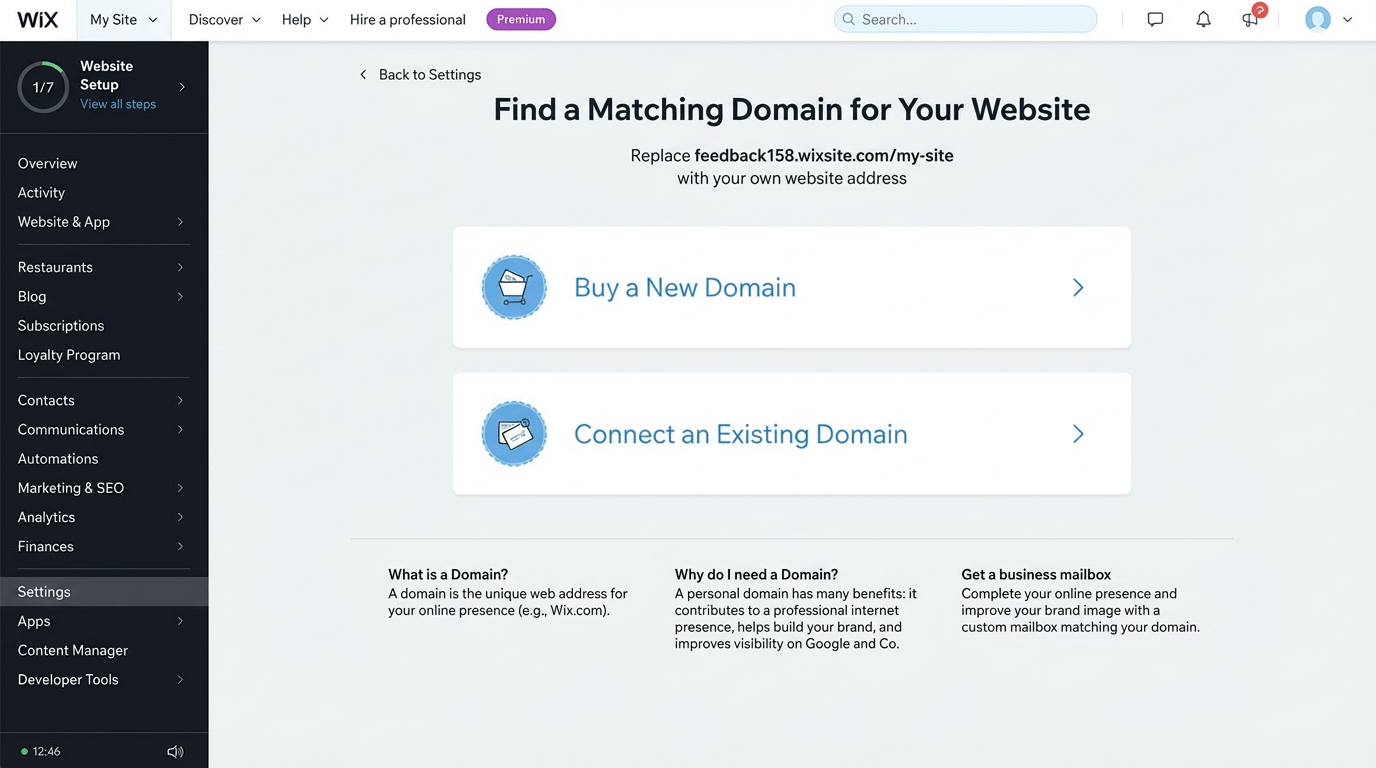
I’ll explain buying and registering a domain using the Wix website builder as an example.
With other tools or web hosts, the process is similar.
Once you’ve signed up with Wix, you can start on the free plan without worrying about a domain straight away.
Your site will be published on a Wix subdomain, but you can switch to a premium plan with a connected domain at any time.
After you’ve built your website, Wix gives you the option to buy a new domain or connect a domain you already own. You can also do this later via the “Domains” section in your account.
First, you check whether your preferred domain name is still available. If it is, you can register it.
The cost for the first year is included in the price of the premium plan.
You then assign the domain to your website. If you previously published a Wix site on a subdomain, Wix will automatically redirect it to your new domain.
Got your website tool and domain sorted?
Great — now it’s time to plan your website.
It’s tempting to open your website builder or CMS straight away and start allowing things together. But with so many options, it’s easy to lose focus and get sidetracked.
A simple plan for your basic site structure helps you reach the result you want more quickly.
Time spent clicking around and experimenting is usually better invested in preparing the layout and structure of your website.
Here’s how to plan your website:
- Think about which content and functions your visitors will expect
- Distribute that content and functionality sensibly across individual pages
- Put the pages into a logical structure (a “sitemap”)
I’ll show you the best way to approach this and give you a few examples.
Pick your key content
Imagine you’re looking for specific information and you land on a website. You’d expect to find what you’re after quickly.
Your visitors feel the same way.
But to provide the information people are looking for, you first need to be clear on who will visit your site — and why.
What are the key pieces of information or features they’ll expect to find there? And where should you place them so they make sense?
Here are a few examples of typical website sections and the kind of content people usually expect to find there:
| Website section | Required content and features |
|---|---|
| Home page | Welcome message with a short introduction, overview of services, trust-building information (customer testimonials, work samples), photos of the business and what you offer |
| About us | Team introduction, expertise, photo or video message, values, vision and mission, company history |
| Our services | Detailed description of your services or product, price list, customer testimonials or reviews |
| Contact / directions | Ways to get in touch, opening hours, map with address |
| Legal notice & privacy policy | Contact details for the site owner, business information, privacy policy |
| … | … |
Example 1: home page
The home page (often simply called “Home”) is the most important page on your website. A strong home page creates a positive first impression in both design and content.
It should make it clear quickly what your site is about. Attention spans online are short: if people don’t find what they’re looking for straight away, they’ll leave. If you describe your offer clearly and briefly, visitors can immediately tell they’re in the right place.
At first glance, your site should feel like a reliable, trustworthy offer. The internet can feel anonymous, so it helps to design your home page in a way that builds confidence.
Your home page is the entry point to your whole online presence. From here, visitors navigate to the rest of your pages. That’s why it makes sense to introduce your main topics and link to them.
Home page checklist:
- Your home page needs a clear opener — ideally a combination of an image (eye-catcher) and a headline (information). The headline can be your site title or a short promise of what visitors will get.
- Near the top, include who you are, what you do or offer, and why someone should work with you or buy from you.
- Make it easy to explore: visible links to key sections or categories help visitors find their way. You could show your latest blog posts or highlight a selection of your most popular services.
- Positive reviews, testimonials, or work samples also help build trust in you and what you offer.
- Authentic photos of you or your business add to that trust, too.
Don’ts:
- Don’t waste your main headline on obvious filler (like “Welcome to our website”).
- Don’t write in long, rambling paragraphs.
- Avoid generic stock photos that could belong to anyone. People want to get to know you and your offer.
A website can also consist of a single home page. With a “one-page design”, you present your offer briefly on one page and usually only link to essentials such as your legal notice and privacy policy in the footer.
The home page is often the biggest challenge when building a website, because you want to fit everything in.
If you’re unsure, follow a proven structure. And if you’re not happy yet, it’s fine to park the home page for a moment and start with your content pages first.
Example 2: About me/us
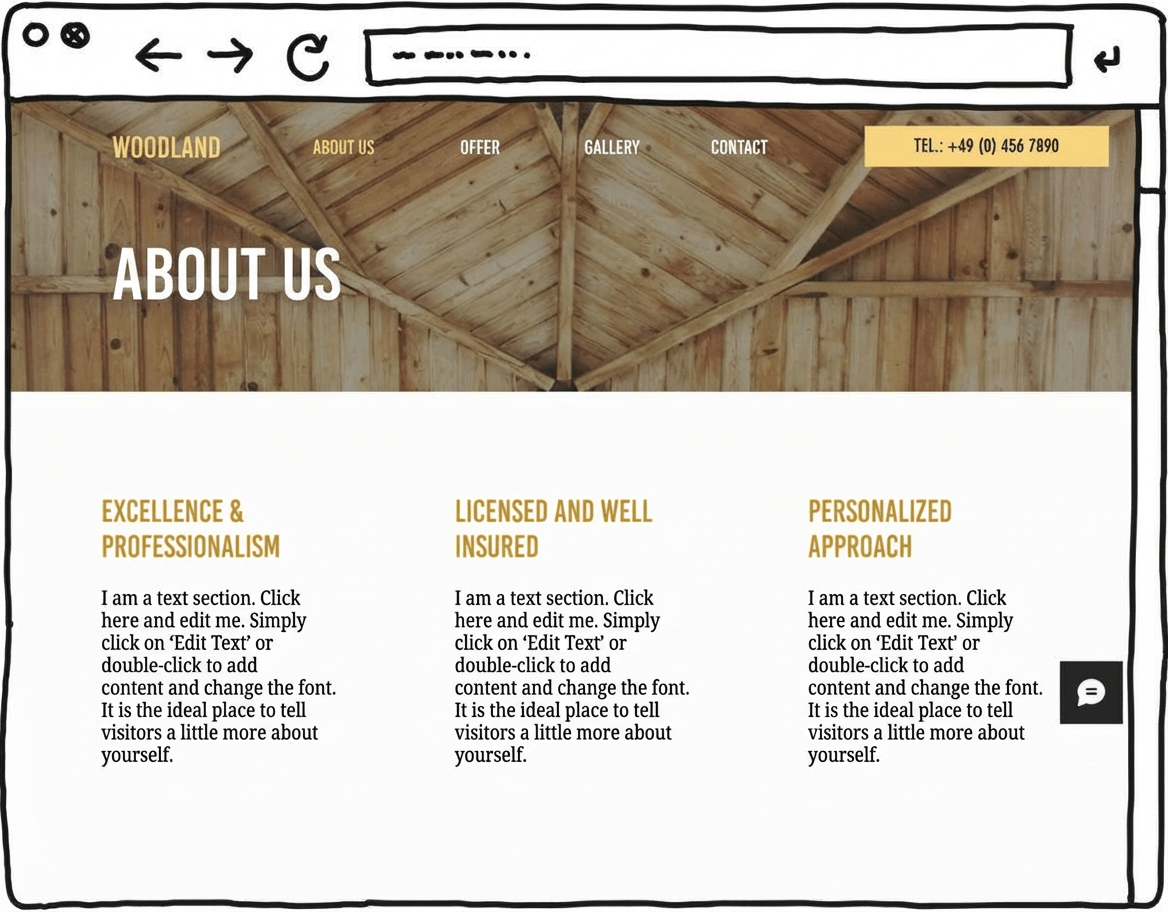
Visitors to your website want to know who they’re dealing with. An informative “About me”, “About us”, or “Our company” page helps you build connection and trust.
You’ve put effort into getting people to notice you. Now you can show those who are interested in your topic what qualifications and expertise you bring.
Don’t forget to use a good photo of yourself, your business, or what you offer.
Present yourself at your best and explain what sets you apart. What’s special about you or your offer? What benefits do customers get when they choose you?
Give people an easy way to contact you straight away or to book what you offer.
About page checklist:
- Choose a clear, fitting title (for example About me/us, Our team/company, or About + brand — such as “About websiteadvisor.co.uk”).
- Use a friendly photo or a short video message.
- Summarise your brand promise briefly.
- Share a bit of background or the story behind your business.
- Introduce your values or philosophy.
- Include direct contact options or a link to your contact page.
- Link to your social media channels, if you have them.
Don’ts:
- Avoid generic stock photos on your About page. People want to get to know you and what you offer.
- Don’t make it overly long — keep it clear and to the point.
Example 3: Services and offers
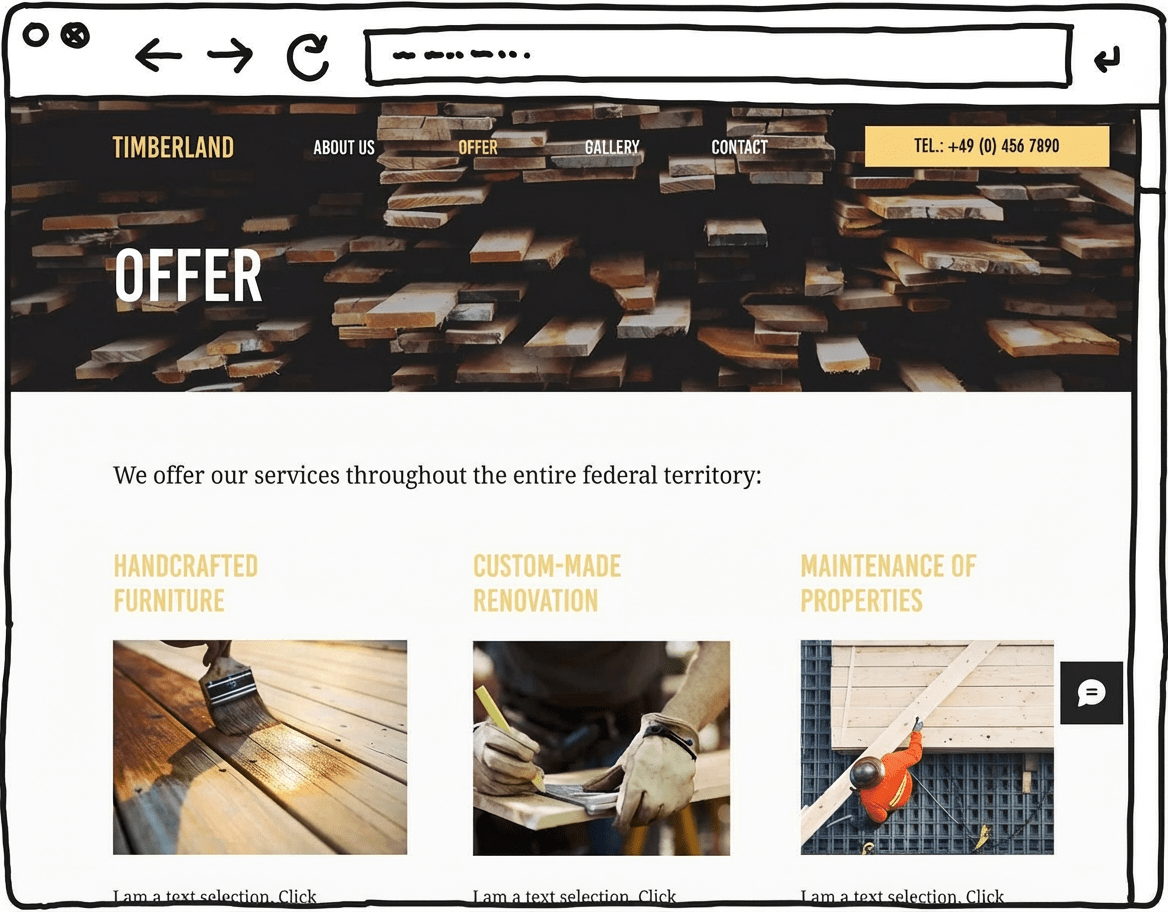
A dedicated page for your services and products makes it easier to achieve your (business) goals — whether you want to generate new contacts, enquiries, bookings, reservations, or product sales through your website.
On this page, give visitors a clear and practical description of what you offer. Make sure you highlight the benefits for the customer.
Include buttons such as “Book now”, “Reserve here”, or “Find out more” so people can enquire about a service or buy a product straight away.
If you offer several services that need more explanation, it’s a good idea to create an overview page. There you briefly introduce each service, and visitors can click through to separate subpages for the full details.
Important: use strong, relevant images for your services and products. Including prices can also be helpful.
Services page checklist:
- Choose a clear, fitting title (for example “Services”, “What I offer”, “Products”, or “Menu”).
- Describe your offer briefly and in simple language.
- List the key elements and details in clear bullet points.
- Good images make your products/services easier to understand.
- Prices help potential customers decide. You can also choose not to show prices if you want to keep pricing flexible or you offer highly bespoke services.
- Customer testimonials and reviews can help convince visitors of the quality of your offer.
- It can also help to answer common questions in a short FAQ section.
- Don’t forget buttons that encourage action — buying, booking, or getting in touch.
Don’ts:
- Too many services and options can be confusing and make it harder to choose. Consider offering clear packages to simplify the decision.
- Avoid complicated jargon that your customers might not understand — or explain any necessary terms.
Example 4: Contact page
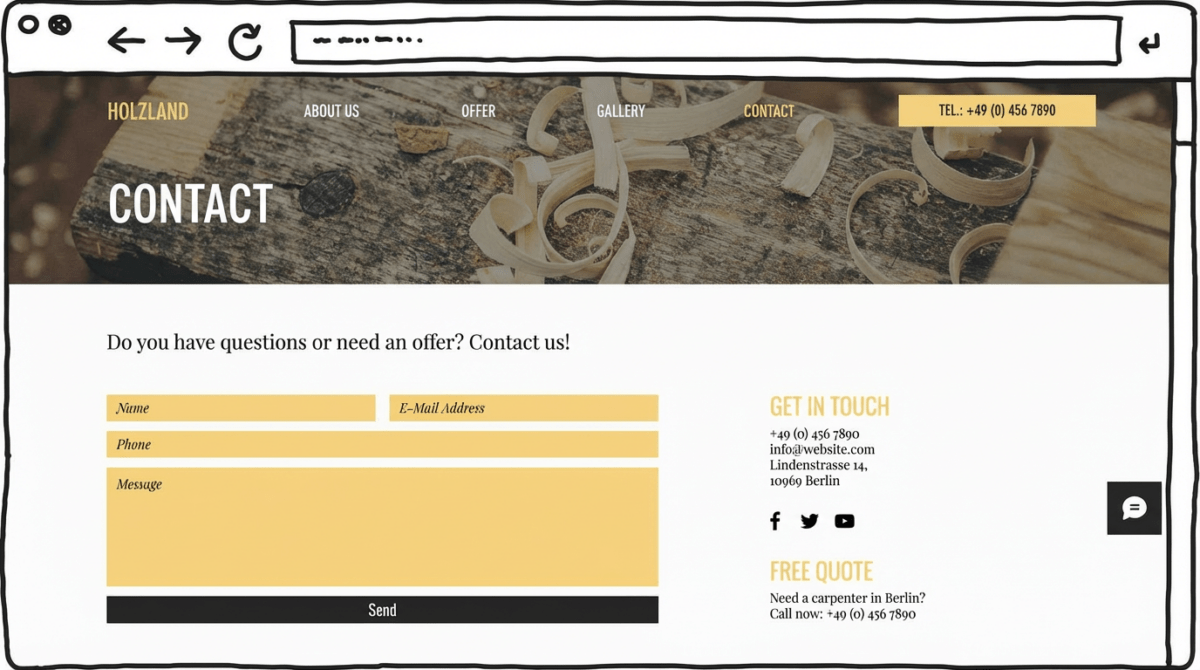
The contact page should make it as easy as possible for visitors to get in touch. That means the relevant details need to be easy to find.
If someone has to search for your phone number, email address, or contact form, they’ll quickly move on to someone else. If the information is clearly visible, it also signals that you value enquiries and feedback.
A contact page isn’t the same as a legal notice page. You have different ways to design it. Depending on the purpose of your website and what you can manage, you might include an email address, phone number, contact form, and postal address — and potentially also social media links or live chat.
If you have a physical shop or office, it’s helpful to include a map with your location(s), directions by car and public transport, and information about parking.
You can also make the contact page feel more personal by adding a photo of you or your team.
Contact page checklist:
- Include ways to contact you (email, phone, chat, WhatsApp).
- List your opening hours or times you’re available.
- If relevant, add your address along with a map and directions.
- A contact form makes it easier for people to message you.
Don’ts:
- Don’t hide your contact details from visitors!
Legal essentials
If you run a website in the UK (and especially if you collect enquiries, run analytics, or sell online), you’ll usually need certain legal and compliance information. Under UK GDPR and the Data Protection Act 2018, you must handle personal data properly, and for cookies and similar technologies the rules mainly come from PECR.
This section gives you a first orientation and introduction to the topic.
However, this is not legal advice. If you have questions about your specific setup, speak to a solicitor.
The UK General Data Protection Regulation (UK GDPR), together with the Data Protection Act 2018, applies to organisations that process personal data in the UK.
In practice, personal data must be processed on a valid legal basis and for a clear purpose. It should be accurate, kept up to date where necessary, and protected with appropriate security measures. People also have rights, such as requesting access to their data and, in certain cases, asking for it to be deleted.
If you use cookies or similar technologies, you generally need to tell users what they do and why — and obtain consent for non-essential cookies, with an exception for cookies that are strictly necessary to provide a service the user requests.
Serious breaches can lead to substantial fines and enforcement action.
This section helps visitors see who is responsible for a website. In the UK, there isn’t a single “imprint” rule like in some other countries, but if you run a site commercially (for example to sell, take bookings, or promote services), you should make key business details easy to find, clearly stated, and permanently accessible.
Purely personal websites are usually not expected to publish the same level of business information. Once a site is used for commercial activity (for example selling products or services), you should treat it as a business website and provide the relevant details.
These details are commonly expected on UK business websites:
- Name and address of the website owner/business
- Contact details (at least an email address, often also a phone number)
If you run a limited company, it’s also typical (and often required) to show:
- Registered company name (including “Ltd”/“Limited”, if applicable)
- Company registration number
- Registered office address
- Where the company is registered (for example England and Wales, Scotland, or Northern Ireland)
- VAT number (if you are VAT-registered)
Other details that may be required or sensible, depending on what you do:
Regulated professions: information about the relevant professional body or regulator, where applicable
ADR: if you commit to an alternative dispute resolution scheme, signpost the relevant ADR provider in your customer communications and website, where appropriate
In addition to basic company details, website owners in the UK are expected to provide a privacy policy under UK GDPR and the Data Protection Act 2018.
A privacy policy tells visitors whether personal data is collected when they use your website, what you use it for, and which data protection rules apply.
It should be transparent, easy to understand, and precise. It also needs to explain the purposes of processing, the legal basis you rely on, and—where relevant—who data may be shared with.
The goal is to make it clear that you handle personal data such as names, email addresses, location data, or cookies that can be linked to individuals in a careful and responsible way.
In your privacy policy, you inform visitors about the type, scope, and purpose of how their personal data is used. You should also explain how they can exercise their rights, including how to object in certain situations.
Make sure you cover areas such as social media features, contact forms, and analytics tools (for example Google Analytics). If you use cookies or similar technologies, your wording should reflect how consent is handled for non-essential cookies.
A UK-compliant privacy policy typically includes:
- The name and contact details of the website owner/business
- Where applicable, the contact details of your Data Protection Officer (DPO)
- What personal data you collect and why
- Your legal basis for processing (for example consent, contract, legitimate interests)
- Who you share data with (for example payment providers, advertising networks)
- How long you keep the data (retention periods)
- Information about people’s rights (access, deletion, objection, etc.) and how to exercise them
- General information about cookies and similar technologies
- Details of analytics and tracking tools you use (for example Google Analytics)
- Information about marketing/retargeting and embedded or social content (for example YouTube, X/Twitter, etc.)
Cookies are small files that are stored on a visitor’s device.
They can make websites easier to use — for example by keeping someone signed in or remembering what’s in a shopping basket. Cookies that are strictly necessary for these kinds of functions are generally allowed.

Create a sitemap
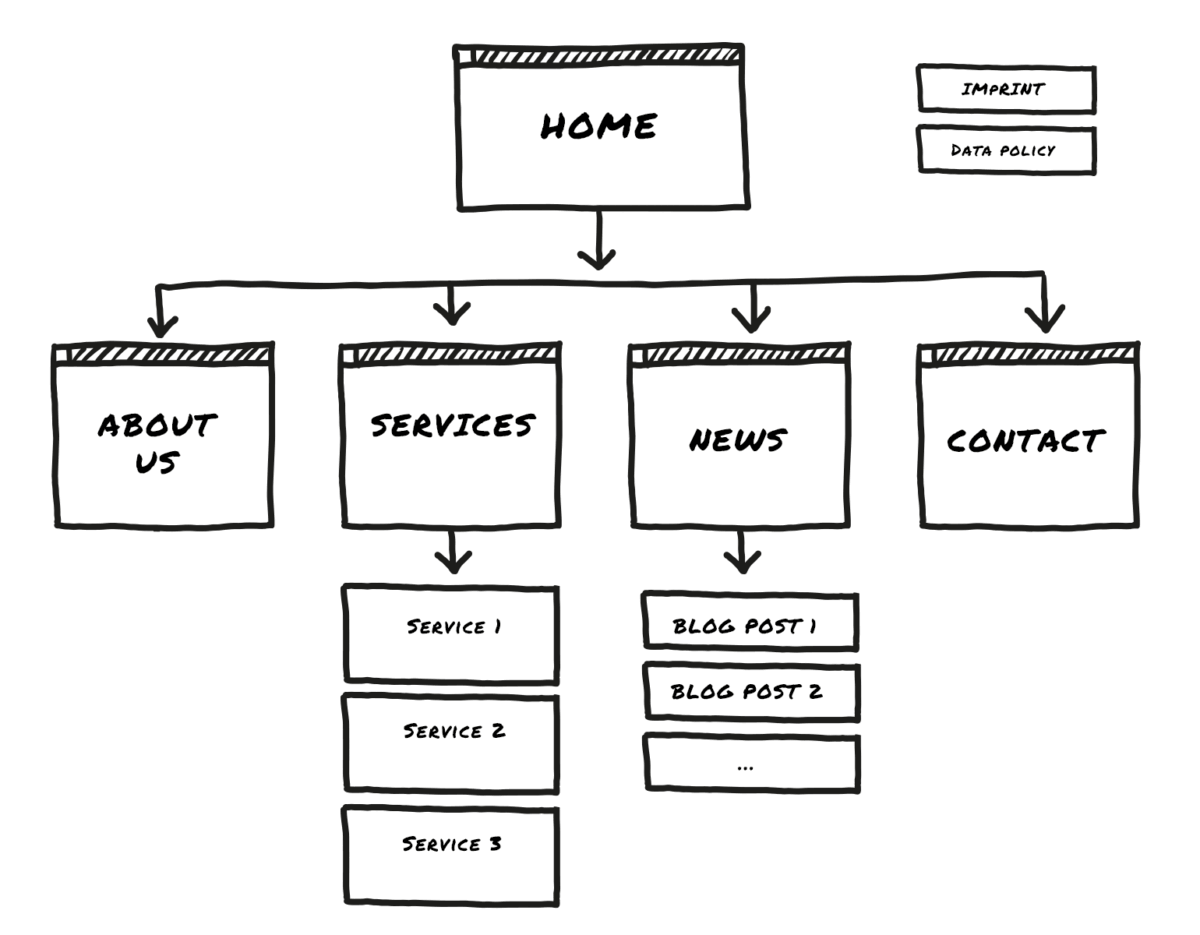
Before you start building pages, map out your navigation so visitors can find what they need in just a few clicks.
Websites usually have a hierarchical structure (a tree structure) that helps visitors find their way around. This structure is often called a “sitemap”.
Visitors navigate your website via the main menu. You set this up in the header area of your site, and it should appear on every page.
Another way to guide visitors is through links within the page itself. These can be clickable images or text blocks, links inside your text, or buttons.
You can sketch your sitemap on paper — or, of course, on a computer:
- Level 1: Home page
- Level 2: Up to 5–7 main menu items (such as “About”, “Contact”, etc.)
- Level 3: Detail pages, if you want to split sections like “Services” into multiple pages
- Level 4 or deeper: Larger websites can have more levels, but for a simple site this usually isn’t recommended
- Utility bar: In a separate area of the header, you can place links to social media profiles, a link to the contact page, or a search function
If you’re planning a multilingual website, create parallel sitemaps for each language. In the header, add a menu option to switch between languages.
All website tools allow you to build and style your site menu. This is where you translate the structure you’ve planned into your actual navigation.
Pages like your company information, privacy policy, and cookie settings are usually linked in the footer. Otherwise, they can distract from the main areas you want visitors to focus on.
Enough preparation — let’s get started!
Once you’ve planned your sitemap, you can finally begin and get your website online.
First, create each page in the website builder tool you’ve chosen or in WordPress. Then connect the pages through your menu and links within your content.
I’ll explain the process — and how to make your pages look good — in the next chapter.
Let’s move on to designing your website.
In theory, if you build your own site, you can start from scratch and create a completely custom design.
In most cases, though, it’s not very sensible to reinvent the wheel. It takes experience to arrange all the content on a website in a clear and easy-to-follow way.
And there’s another point: visitors usually find it easier to get around when a website follows a familiar, standard structure.
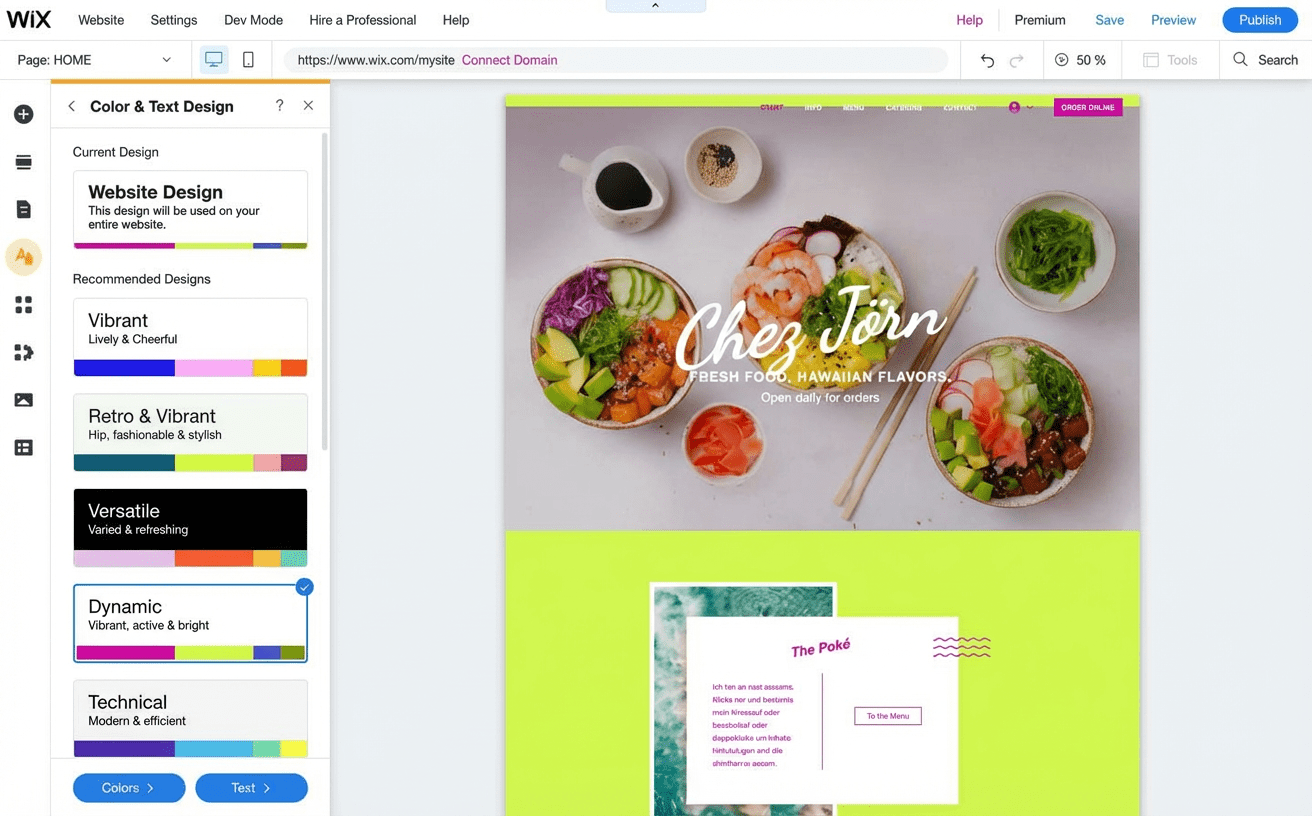
Templates and themes
All tools (website builders, WordPress, and online shop systems) work with design templates — often called templates or themes. They make sure your different pages share a consistent look and layout.
You can choose from a wide range of ready-made templates. To make your site feel unique and clearly yours, you can customise them — for example by adding your logo and your own images, or by changing colour schemes and fonts.
Templates are so varied and flexible that you can almost always find something that comes close to what you have in mind.
Advantages of design templates
- Created by experienced designers
- Plenty of display options and layouts that you can combine
- Easy to use (which saves you a lot of work later)
- Meet technical standards (for example, mobile optimisation)
- Designed for different website types, industries, and visual styles
Website builders are generally very flexible and modular in how you can put pages together.
With WordPress and shop systems, there can be limits to how freely you can customise things (some templates aren’t easy to adjust without technical know-how).
Template checklist
I recommend choosing a theme that already roughly matches the structure you want. The closer it is from the start, the easier it will be to achieve the result you’re aiming for later.
Design requirements:
- Appealing layout: the theme suits you or your business and already comes close to your preferred look
- Flexible modules: a broad, mix-and-match set of layout elements (image/text sections, galleries, lists, etc.)
- Fits your content: themes that rely heavily on large images will only look good if you have enough high-quality visuals
- Space for your logo: if you have a logo, make sure the theme gives it enough room in the right shape. Especially if your logo is square or taller than it is wide, it can look squeezed in some layouts. Tip: don’t have a logo yet? You can use a logo generator to create one.
Functional requirements:
- Features: the functions you’ve planned (contact form, booking request, location map, etc.) are included or can be added via plugins
- Navigation and search: the menus work with your planned site structure (this can be especially important for multilingual websites)
- Responsive design: don’t just test the layout on a large screen — check whether it also looks good and feels right on a smartphone
With a website builder, the functional requirements are usually covered by default. That means you can focus mainly on design and your personal preferences.
If available, preview your chosen theme in a demo view. That helps you judge the design options, as well as how animations and other features are used.
With WordPress, it’s worth looking more closely. Anyone can publish themes, and high-quality templates are often paid.
Recommended design templates
To make your choice easier, I’ve selected a range of strong themes across different tools and use cases.
That said, most tools offer many more templates than the ones listed here. If none of my suggestions fit what you’re looking for, you can of course browse the libraries yourself and choose a different option.
“Property consulting” (Wix) 
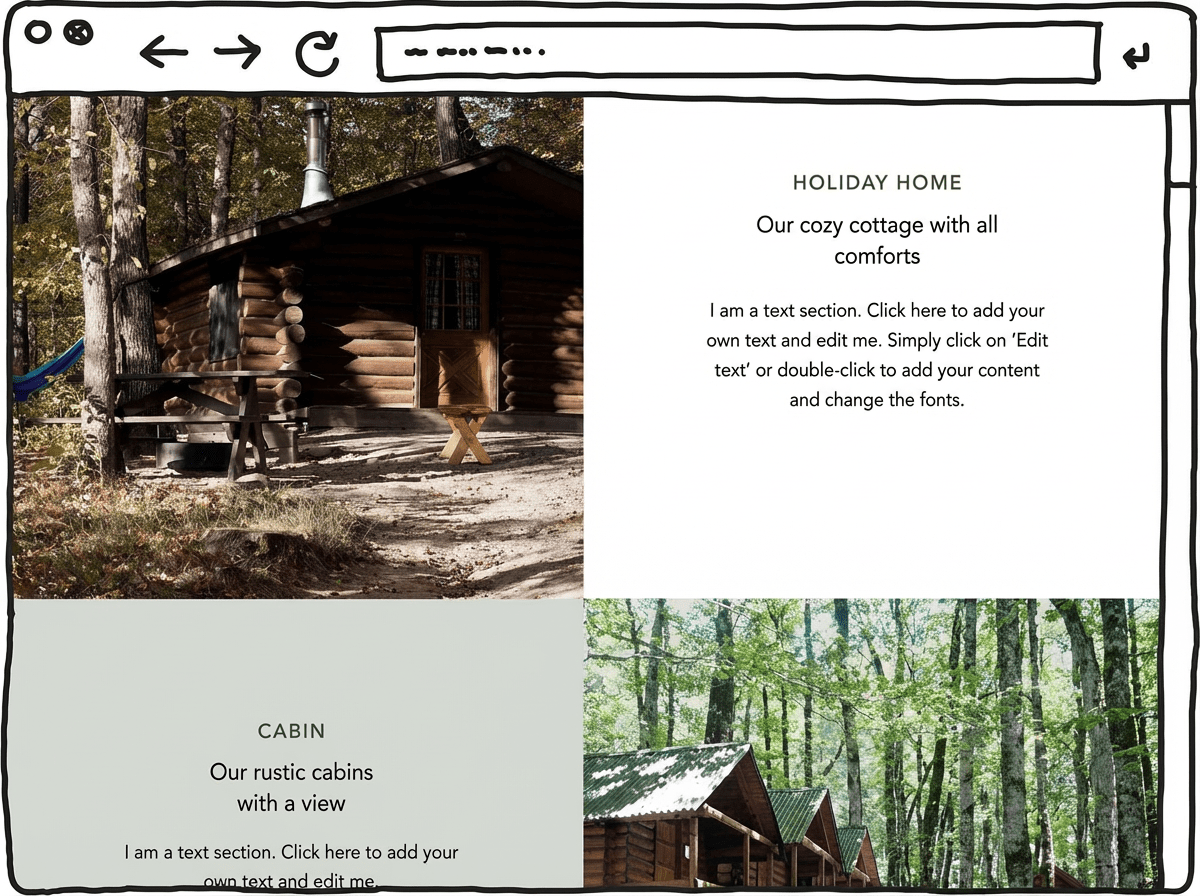
“Campsite” (Wix) 
“Agency portfolio” (Wix) 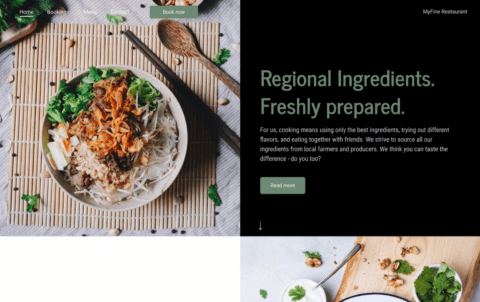
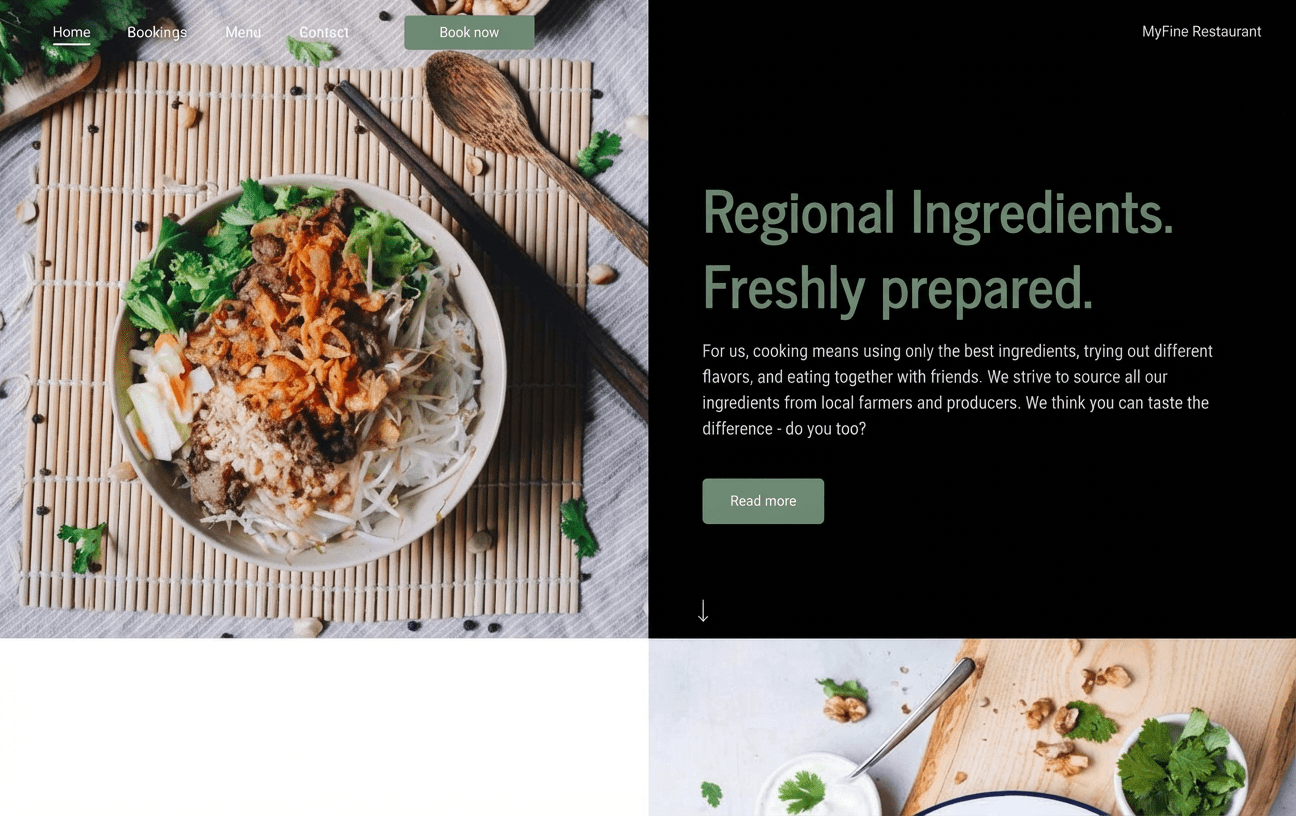
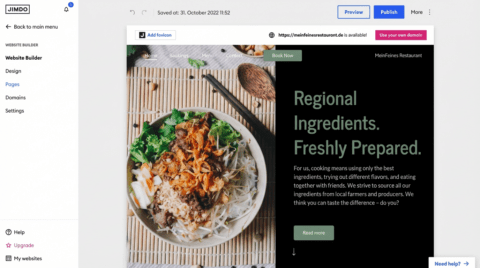
Restaurant website (Jimdo) 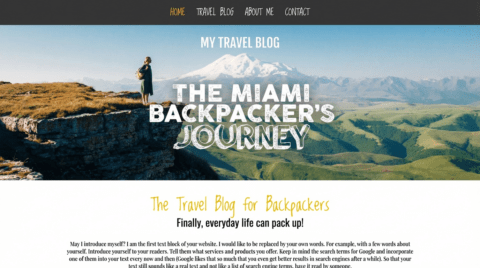
Travel blog (Jimdo) 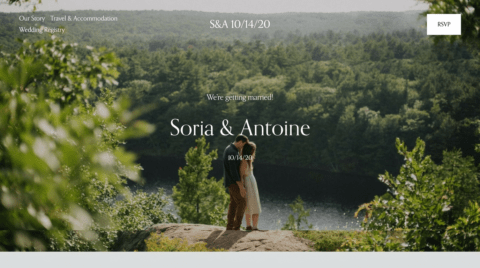
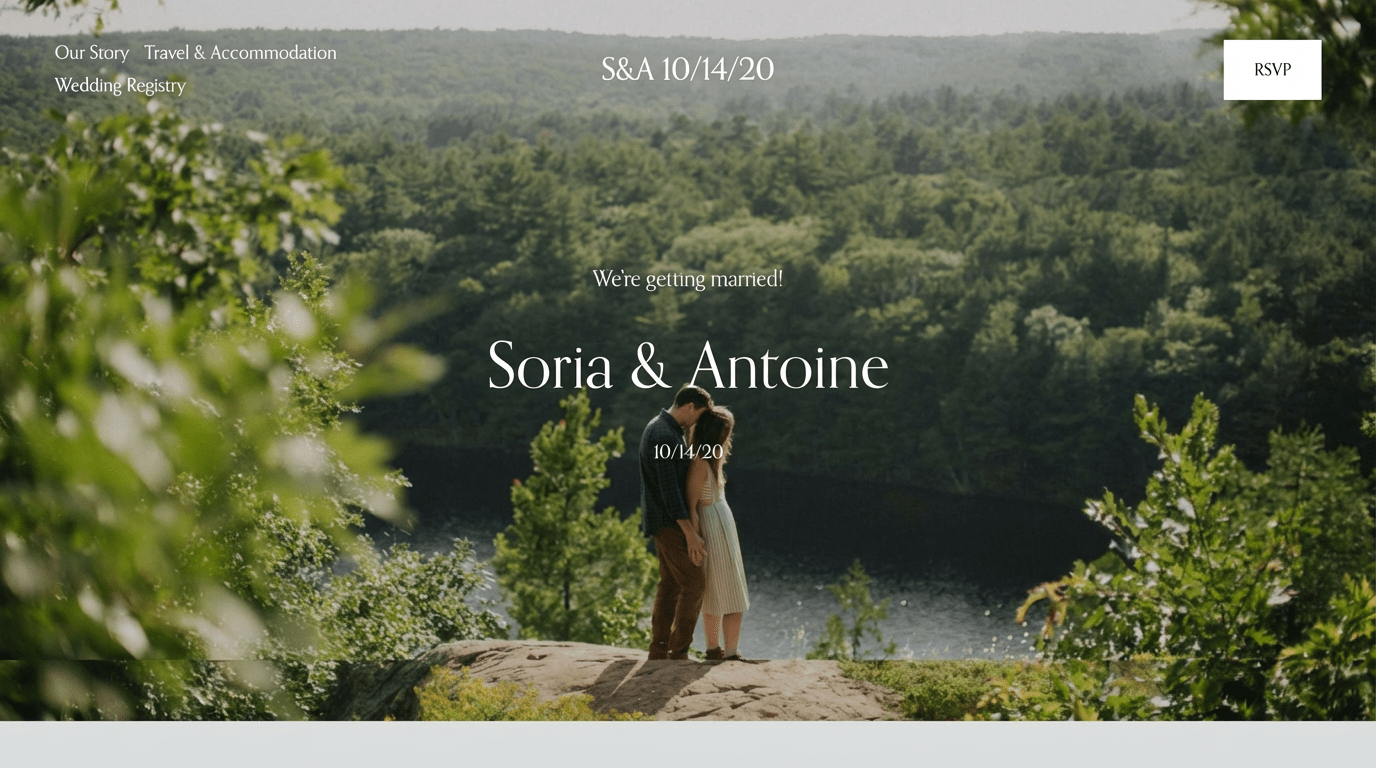
“Soria” (Squarespace) 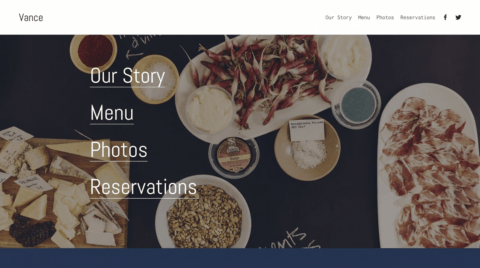
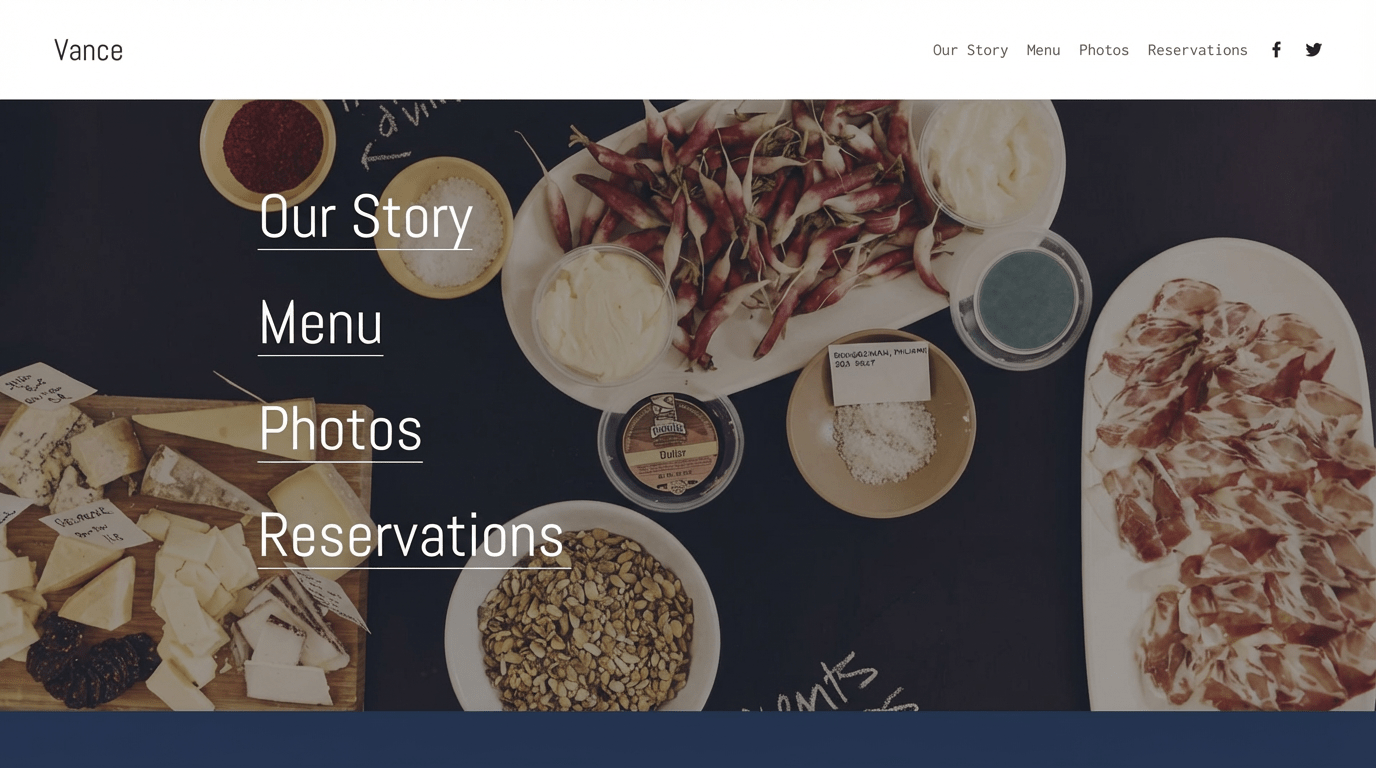
“Vance” (Squarespace) 
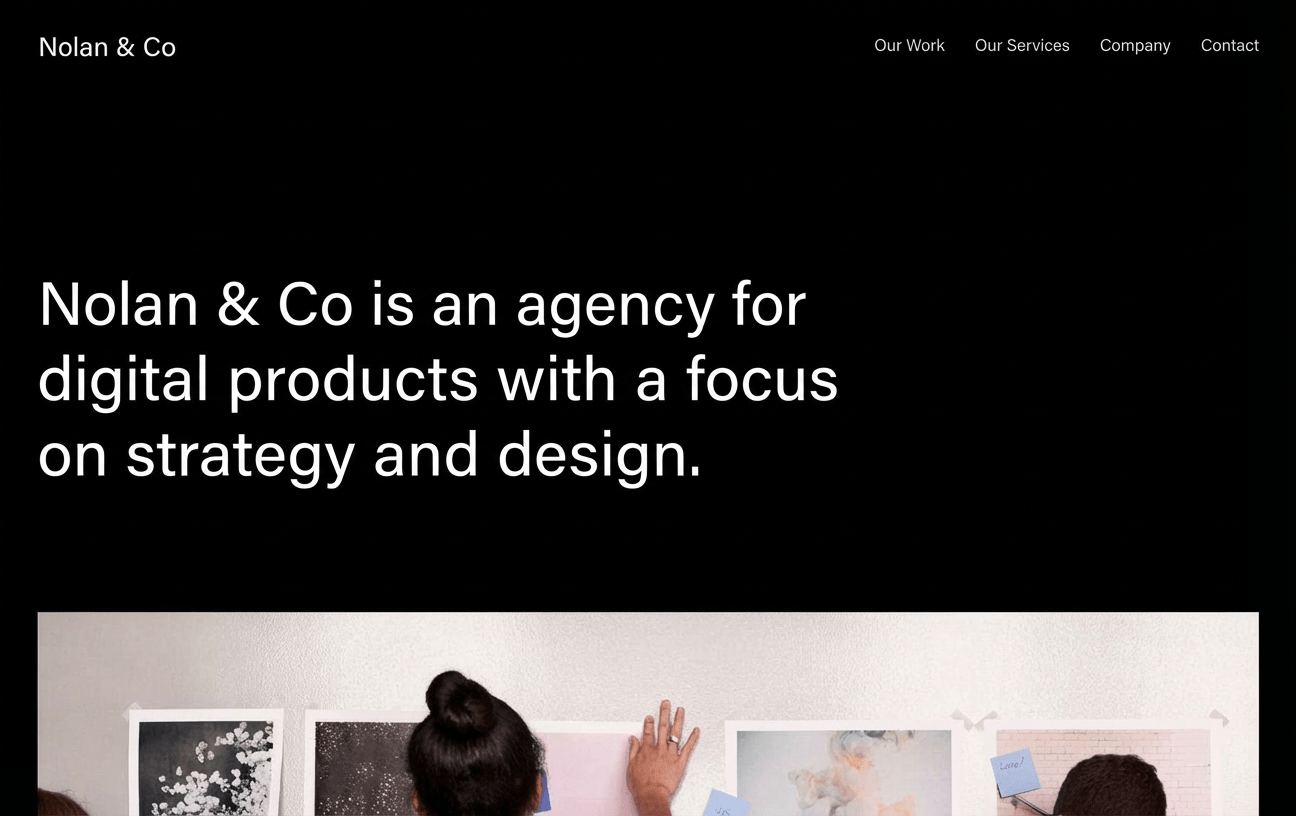
“Nolan” (Squarespace) 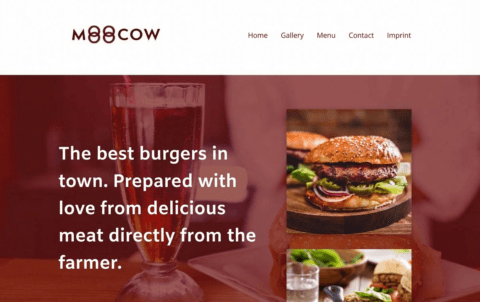
“Burger Restaurant” (IONOS) 
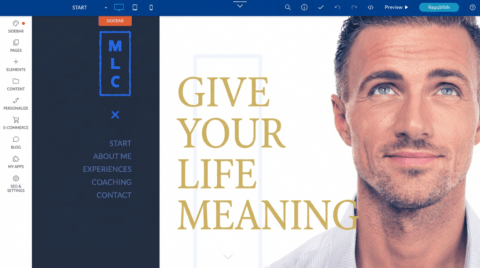
“Coaching” (IONOS) 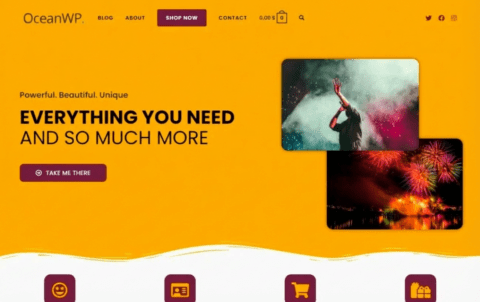
“OceanWP” (WordPress) 
“Björk” (WordPress) 
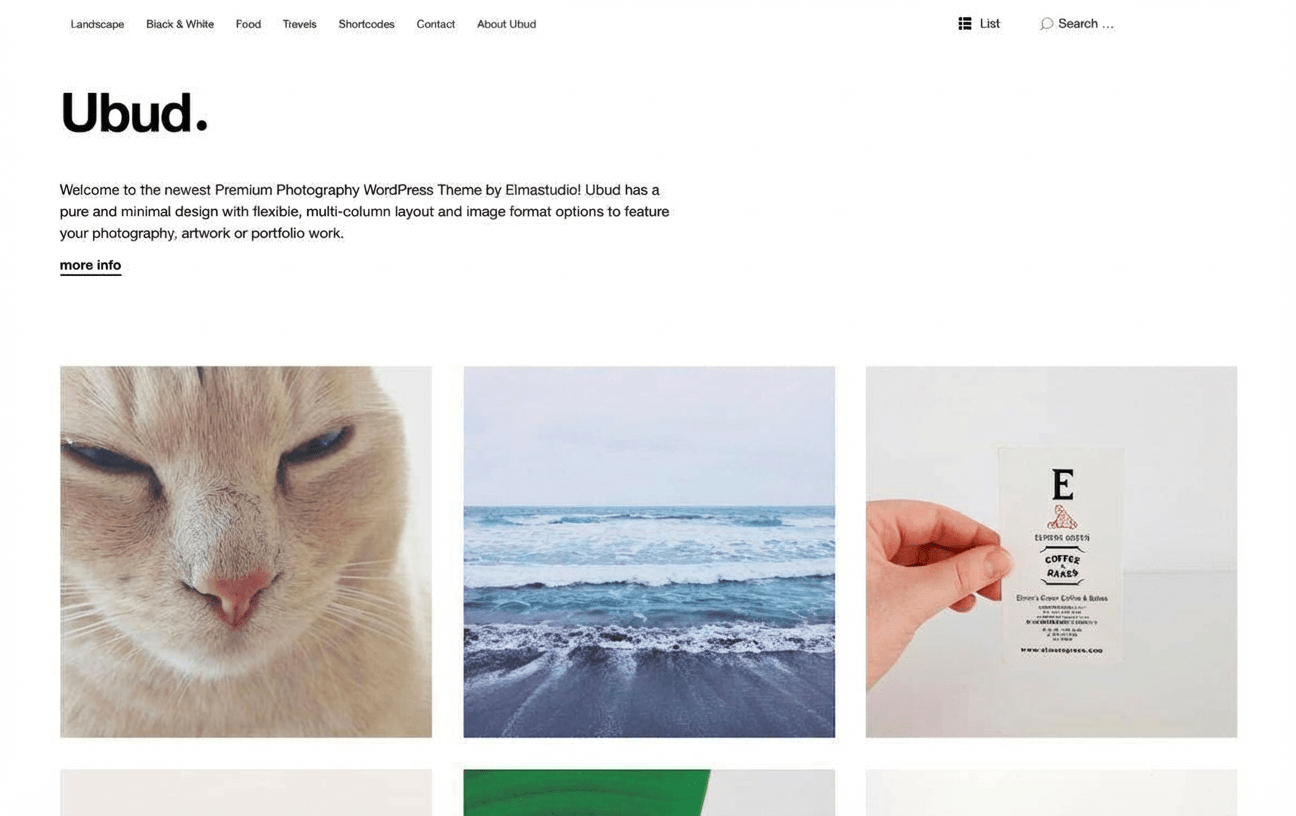
“Ubud” (WordPress) 
“Dawn” (Shopify) 
“Craft” (Shopify)


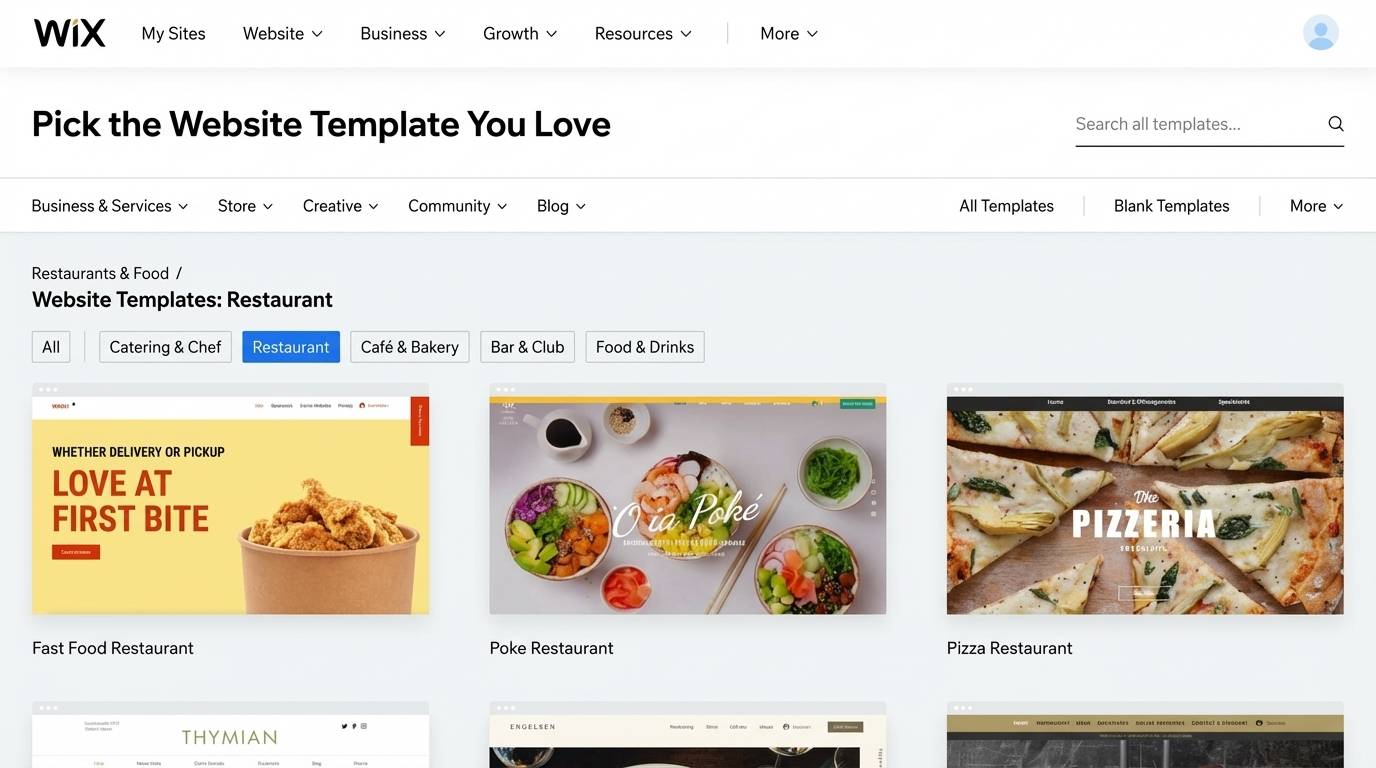
You can also browse the theme libraries of the different tools yourself:
- Wix (Website > Website Templates)
- Jimdo doesn’t have a classic theme library — instead, a setup assistant suggests suitable designs based on your answers.
- Squarespace (Website templates)
- IONOS (Website > Website Builder > All designs)
- WordPress (Themes)
- Shopify (Get started > Shop setup > Shop themes)
Now that you’ve found a theme, I’ll explain the next step: how to customise it.
I’ll walk you through it in detail.
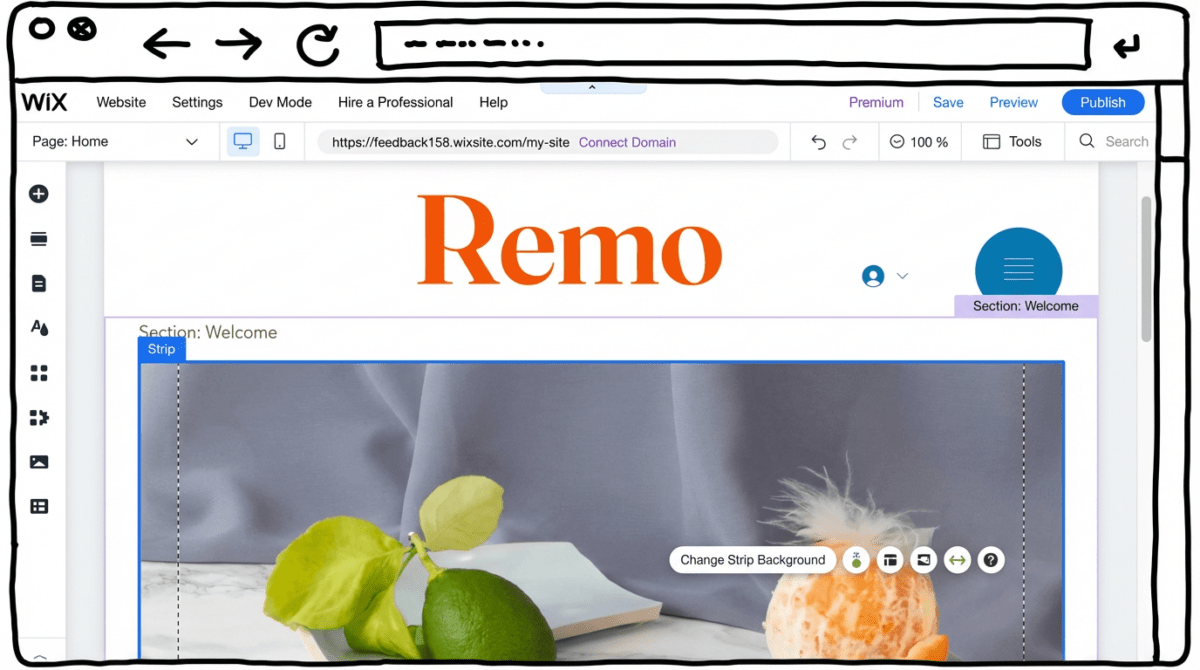
Customise a Wix template
I’ll create a website in Wix for a fictional restaurant. To do that, I click “Create a new website”. When asked what type of website it is, I choose “Restaurant”. For the name, I pick “Chez Jörn” — you can change this later.
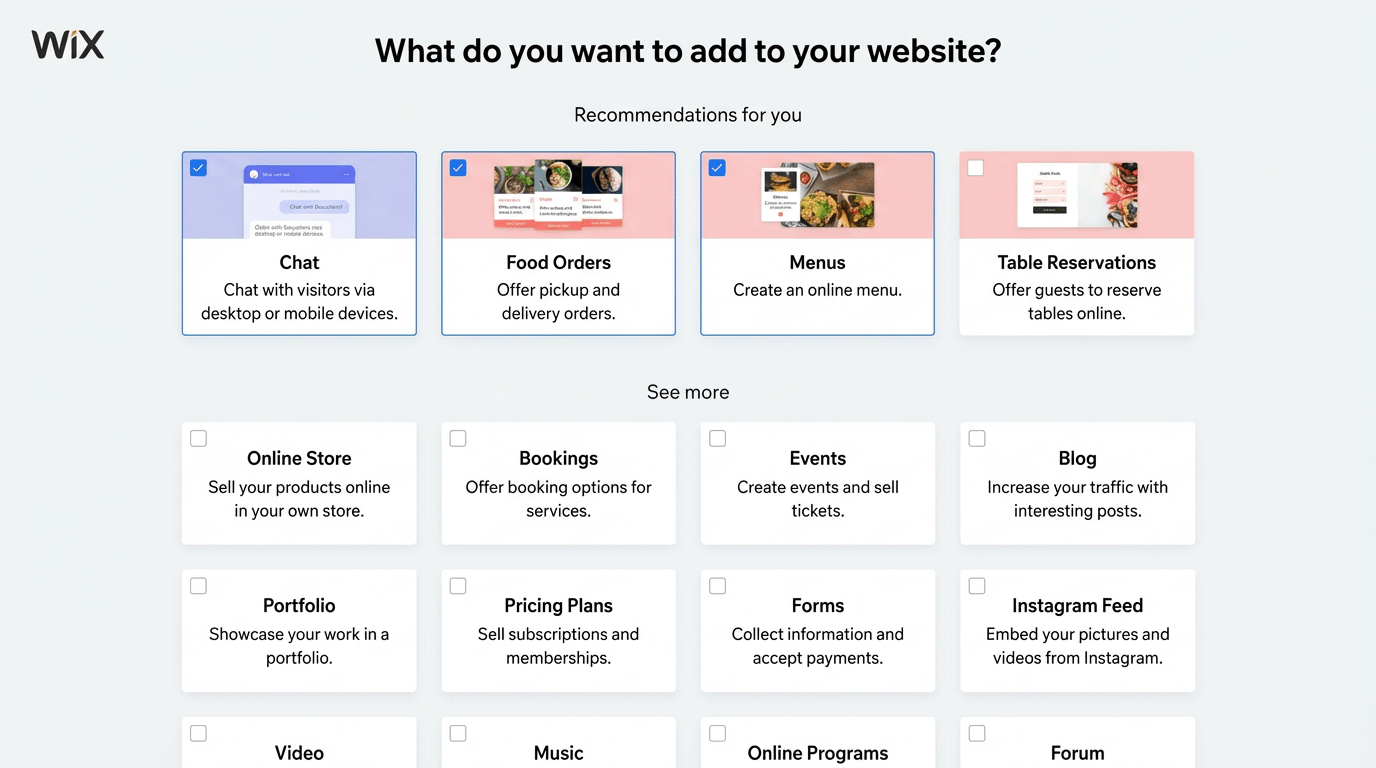
Next, you can add the modules you want on your website, for example a blog, an Instagram feed for photos, a menu, or the option for guests to book a table online.
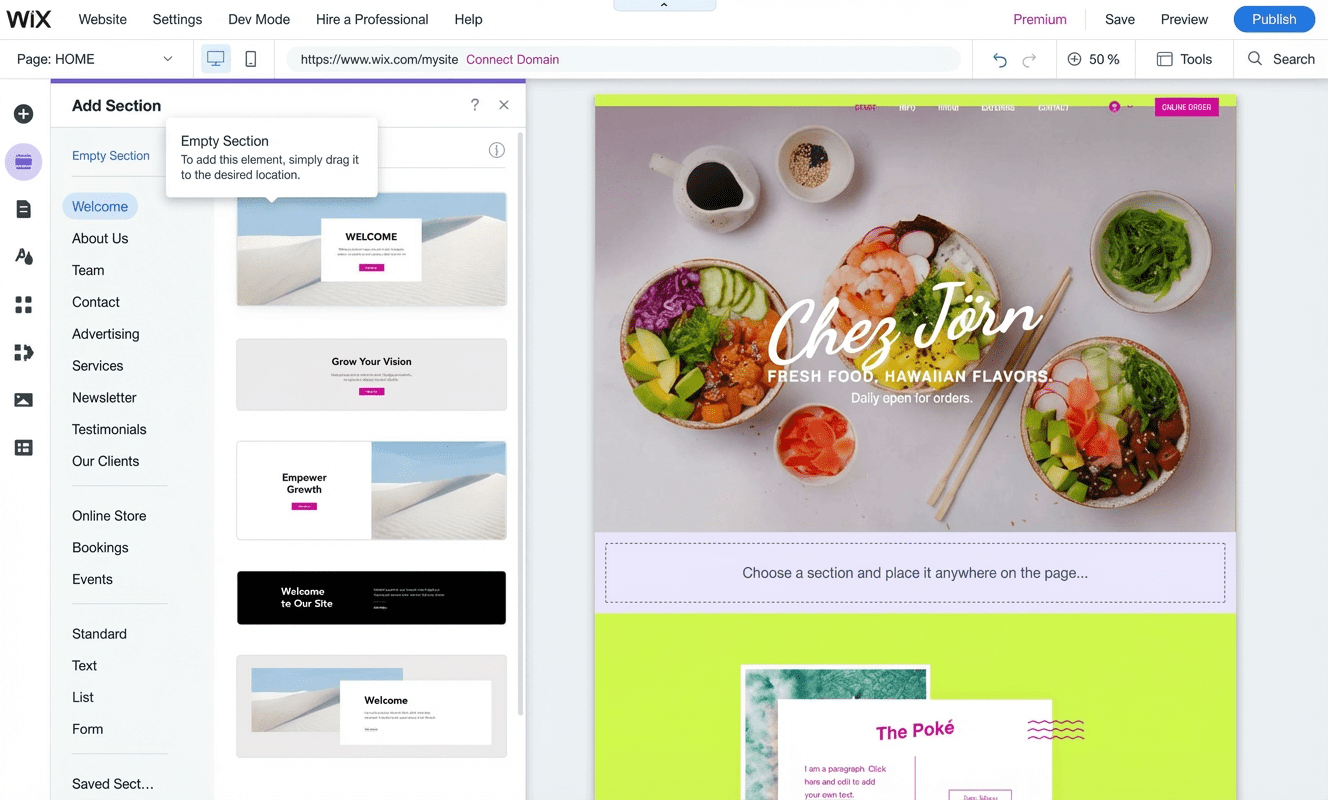
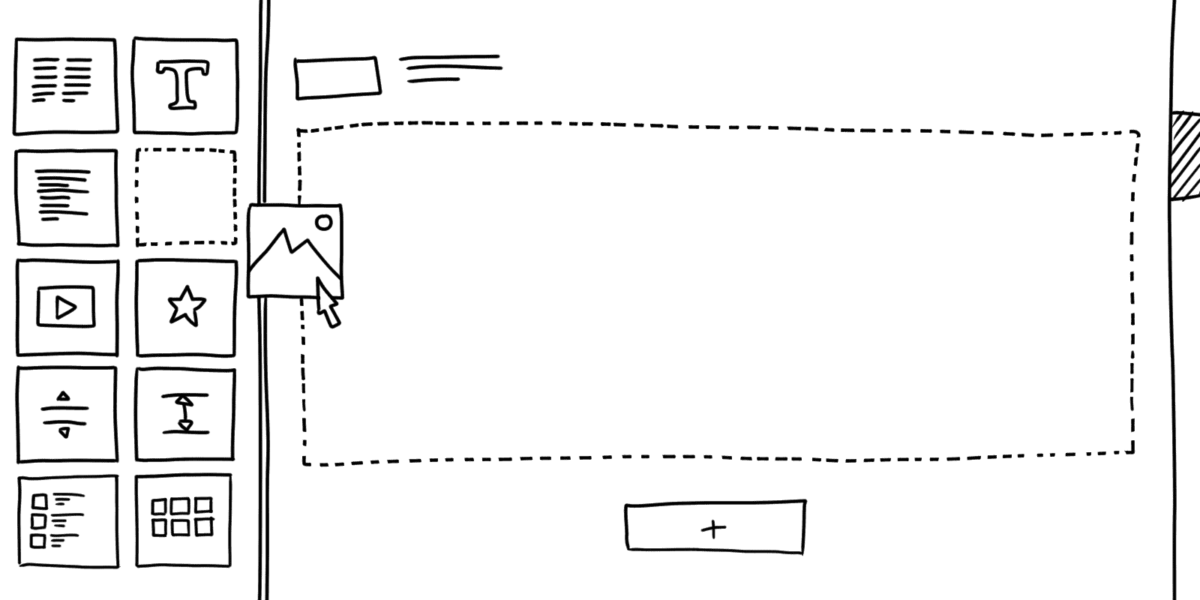
Using the “Add section” option, you can now adjust the individual pages of your website. For example, you can start with the “Home” page.
Templates like the one I chose consist of pre-built sections for different purposes (for example “Welcome”, “Bookings”, or “Form”). You can add, customise, or remove these sections as you like.
I selected a “Welcome” section and added it to the page. For the greeting text, I can get suggested copy ideas. I can also fill the background using suggested images.
You edit the content of existing sections by clicking on an element and changing the text, swapping images and colours, or adding links. You can use the images provided or upload your own.
Don’t forget to save regularly. You’ll find the button in the top right corner of the editor — and you can also enable “Auto-save” there.
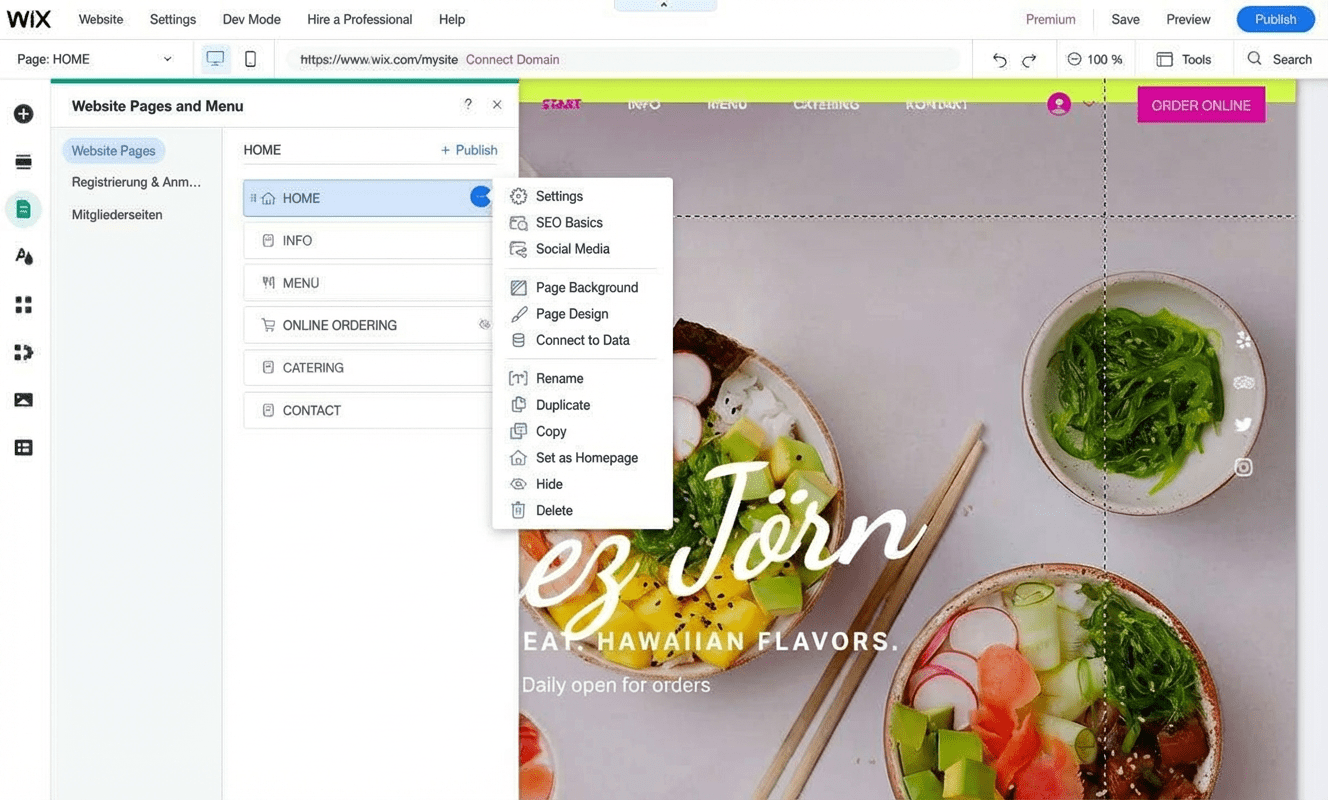
In the “Pages & menu” section, you can implement the website structure you planned earlier. Click “Site menu” and then “Add page”. Here you choose a page template you don’t have yet — for example “Contact”.
This page is then added as part of your site menu. You can also add links in your menu or create submenus. For simplicity, though, I’d avoid that at the start.
If you have several pages with a similar layout, you can duplicate a page and adjust it afterwards.
You can hide pages like your legal and privacy pages from the main menu via the page settings (the three-dot icon next to the page name). Just click “Hide”. If you want to add the page back into the menu later, click “Show”.
Customise templates in other tools
When you create a new website with Jimdo, you get two options: you can have your site generated automatically using a setup assistant, or you can build the page design yourself in an editor.
With the IONOS Website Builder, you first choose a plan. You’re then asked for your preferred domain name and whether you’re interested in paid add-on services — but you can skip these steps. After that, you create an IONOS customer account.
It may take a short while for your account to be set up before you can continue with building your website. Once everything is ready, you click “Get started” and are taken to the template selection.
After that, you go straight into the editor. Similar to Wix, you can edit your site structure here. You begin with the home page and three subpages. In the left-hand menu, you’ll find sections such as “Content”, “Design”, and “Pages”.
In the “Content” area, you can add and edit sections, text, and images.
Under “Pages”, you can add new pages via “Add page”. You can hide pages like your company information and privacy policy from the main menu and link them in the footer instead.
In the design area, you can adjust colours, fonts, and shapes — or switch to a different template later on.
Under “Settings”, you can adapt privacy settings and your business profile. You can also insert custom HTML/JavaScript under “Head code”, which is useful for analytics or advertising tools such as Google Analytics or AdSense.
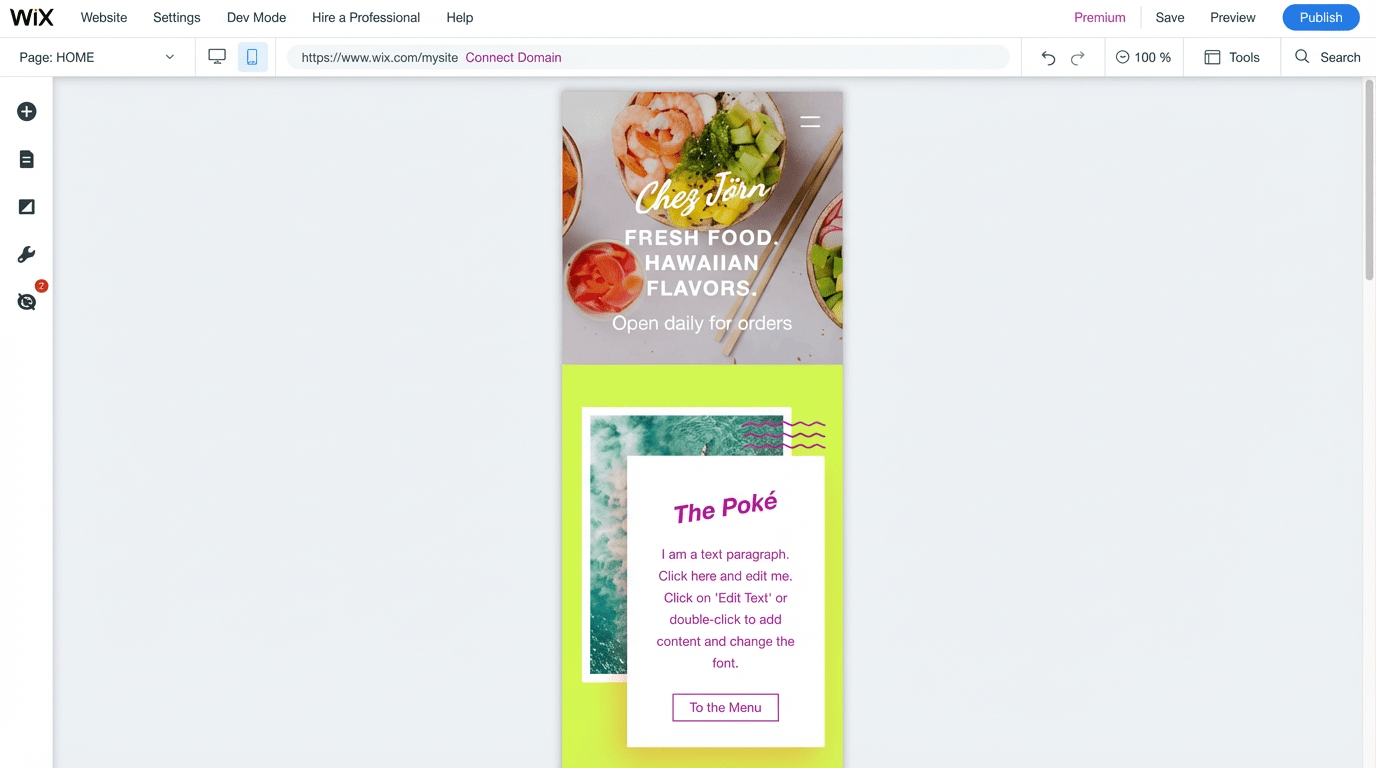
The preview option lets you see how your website looks on smartphones and tablets. Unlike Wix, there isn’t a separate mobile editor for mobile-specific adjustments.
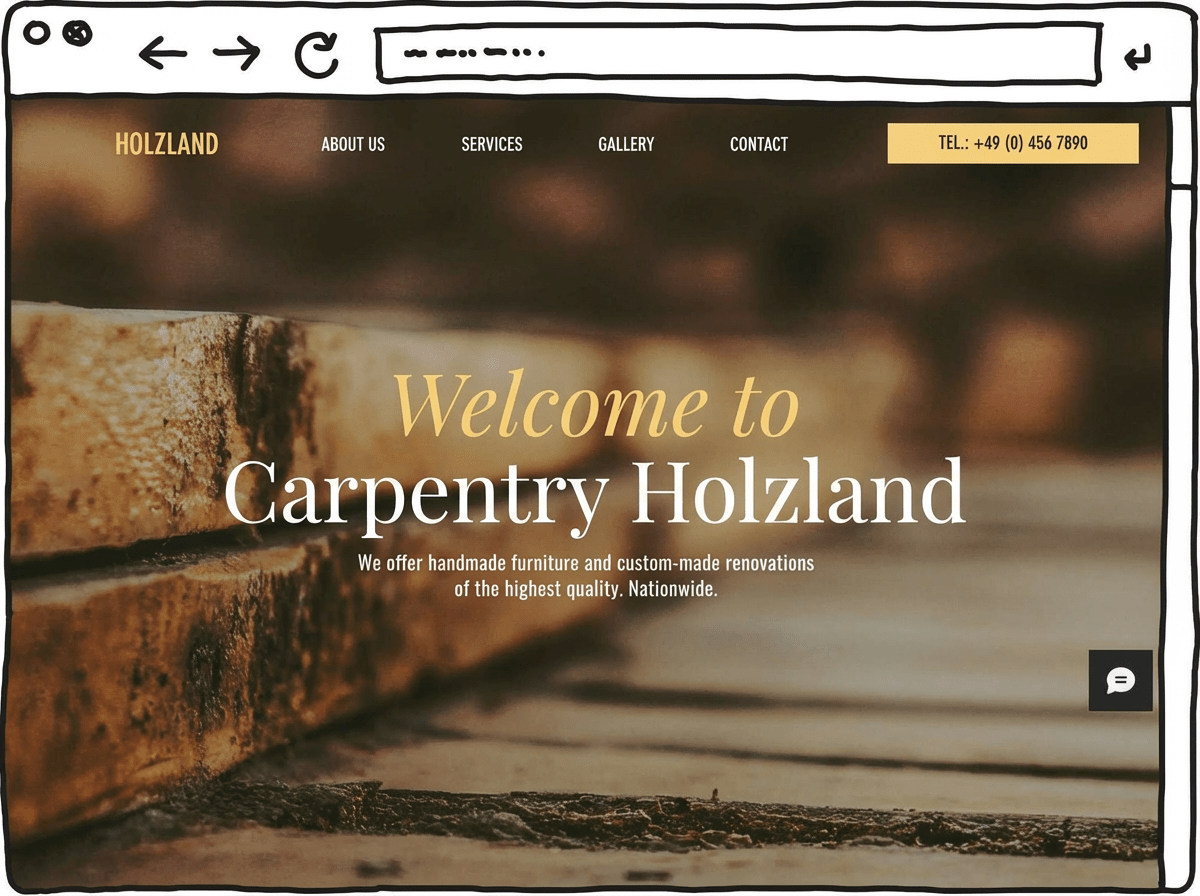
Use strong images and text
A good-looking design matters.
But your content — clear writing and strong images — is at least as important.
Why content matters:
- Convince visitors: your content is the real reason people come to your site. With text and images, you inform visitors and help them understand you and what you offer.
- Stand out: unique images and clearly written text give your template a distinctive character. This helps you differentiate yourself from competitors.
- SEO: well-prepared content makes it easier for search engines like Google to find and understand your site.
If you follow a few basic rules, you can usually write the texts yourself. For images, hiring a professional can be worthwhile. Here are a few tips:
Tips for using images
The internet is a visual medium. For most people, it’s easier to take in information through images than through text.
Images break up content, especially when you have a lot of text. On the home page in particular, good images catch attention and encourage visitors to explore your site further.
Image checklist:
- Make a plan: Which images do you need on which page? Use your sitemap as a guide.
- Invest in your own good images: It’s worth the effort. Your website will feel more authentic than if you rely on stock photos (unless you’re dealing with very abstract topics).
- Bring in a professional: If photography isn’t your strength, hire a professional photographer.
- Use illustrations: For abstract topics, consider drawings and illustrations, which you can often find cheaply or even free in stock libraries. We use these on websiteadvisor.co.uk.
- Watch loading times: Images affect performance. Too many large files slow your site down, which can put visitors off and may also hurt your Google rankings.
Some website builders, such as Wix and Squarespace (and to a limited extent IONOS), include access to professional image and illustration libraries. Otherwise, you can use free stock services like Pixabay or Unsplash.
Write for the web
Text is the most important source of information about you and what you offer — alongside images.
But don’t overdo it. When it comes to online copy, less is often more.
(Yes, I know… exceptions like this ultra-detailed guide prove the rule!)
Put yourself in your visitors’ shoes: what information do they expect, and how can your offer help them?
Also keep in mind that mobile users often just scroll quickly. How can you make sure they still take something away?
Website copy tips:
- Keep it short and get to the point quickly. Visitors don’t have much time and want answers fast.
- Write clear, easy-to-understand sentences. Paragraphs make reading easier.
- Structure your text with headings and subheadings. This helps people pick up information even when skimming.
- Summarise the main points at the beginning. That sparks interest and makes it clear what the text is about.
- Avoid mistakes and duplicate content. Ask family or friends to proofread your text.
As preparation, it helps to write down the key information you want to communicate as bullet points. Use your sitemap to assign your text to the pages and sections of your website.
The most exciting moment: publishing your website!
What does it feel like to finish your own website and actually put it live?
A great feeling, right?
With most website builders, all you need to do now is click “Publish”. But take a few more minutes before the final launch to check these four things.
Final pre-launch checklist:
- Function test: click through all pages and features calmly. Is everything the way it should be? Do links and interactive elements work?
- Browser check: test your site in different browsers. Don’t forget to check the mobile view on a smartphone and/or a tablet.
- Feedback: ask family and/or friends for a final round of feedback. Can they find their way around? Do they notice anything that feels off?
- SEO settings: quickly review the SEO settings in your website builder or CMS. The goal is for page titles and preview text to look good in Google and other search results.
Congratulations — your website is live!
And that’s it: you’ve done it, your website is online.
Well done — you can be proud of yourself!
I’d love to hear in the comments what you think of the result. And I’d also appreciate any feedback on the guide and your experience using it.
Did you build your website with the help of this guide? Then I’m excited to see what you created!
Do you have more questions? Feel free to post them in the comments below and I’ll reply as soon as I can. And don’t worry — no topic is too specific and no question is silly.
Building a simple website with a handful of pages can be done in a day using a website builder — as long as your preparation is solid.
If you use a CMS such as WordPress, it’s more realistic to plan for two to three days.
This assumes you already have the texts and images ready to add. I also recommend working with a template that roughly matches the structure you want.
The more complex the website, the longer the setup takes. Interactive features such as connecting to database interfaces — especially where there are no ready-made components — can take a lot of time.
Large amounts of content can also be time-consuming, particularly if you plan to translate it into multiple languages. For the first version of our website websiteadvisor.co.uk, for example, we needed more than six months.
Here are 7 tips for creating a good website:
- Clarify upfront what type of website you want to build
- Choose a tool that suits that type of website
- Follow a proven page structure (use a sitemap)
- Pick a design style that fits your brand
- Pay attention to mobile display (responsive design) and fast loading times
- Keep your text short and get to the point
- Use authentic images and illustrations
Some website builder tools let you create a website completely free of charge. These are usually permanent “free plans” that you can publish.
In that case, you typically won’t get your own custom domain, and you may see platform branding or adverts. For personal use, that’s often good enough.
These tools offer free website creation (with limitations):
- Wix: free plan (subdomain, Wix branding/ads)
- Jimdo: free plan (subdomain, Jimdo branding)
- WordPress.com: free plan (subdomain, ads/branding, no plugins)
You can also build a website using your own WordPress installation without paying for WordPress itself. However, you still need web hosting to put the site online — and that usually costs a small monthly fee.
The initial build of a website can involve one-off costs — for example if you hire someone to create it. However, you should then also expect further costs for future changes, extra features, or ongoing maintenance. Another ongoing cost is web hosting, which is usually paid monthly.
If you build your site using a website builder, you typically pay a monthly fee that already includes hosting. These costs are usually only a fraction of what you’d pay a freelancer or agency to build the site for you.
With free plans from Wix, Jimdo, or WordPress.com, building a website and hosting it on a subdomain can cost nothing. In return, the available features are quite limited.
There are good arguments for both options. If you want to save time and avoid dealing with the details, hiring someone to build your website can be a sensible choice. The downside is the higher cost. If you want to spend less money and keep full control over the website, setting it up yourself is usually the better route.
Website builders are a strong option for creating a professional-looking site with low effort and manageable costs. Even beginners can often do it in a few hours. In my step-by-step guide, I’ll help you through the process — and you can share questions or ideas in the comments, too.
For beginners who want to create a simple, affordable website on a small budget and with minimal effort, a website builder is usually the better option. Hosting and technical support are typically included.
The open-source CMS WordPress is the better choice if you want to build a larger, more customised website.
In that case, though, you’re generally responsible for hosting, installation, and dealing with technical issues yourself.
Website builders like Wix or Jimdo stand out for their easy drag-and-drop editors. Professional templates provide a solid baseline for a personalised look. If you already have your images and text prepared, you can often finish a website in a few hours.
WordPress is attractive because — if you have some technical know-how — you get much more control over how your site works and looks, with a huge range of themes and plugins. “Quick” and “easy” aren’t really WordPress’s main strengths. But if you want more than just a simple website, WordPress can be a better long-term fit.
You might also like
- Create a website in 2026: 5 simple steps Read article
- Build a budget website: cheapest tools & step-by-step guide (2026) Read article
- Create a coaching website: top tools, costs & tips (2026) Read article
- Create a hotel website: top tools, costs & tips (2026) Read article
- Create a photography website: top tools, costs & tips (2026) Read article
- Create a portfolio website: top tools, costs & tips (2026) Read article
- Create a website for doctors: top tools, costs & tips (2026) Read article
- Create a rental website: top tools, costs & tips (2026) Read article
- Create a restaurant website: top tools, costs & tips (2026) Read article
- Create a school website: top tools, costs & tips (2026) Read article
- Tradesman website: top tools, costs & tips (2026) Read article
- Create a wedding website: top tools, costs & tips (2026) Read article
Comments and ratings
Was this article helpful?
Rate article
Share article